📱 Mobile Scanning Guide
Scan receipts from your phone and have them arrive in Bookkeeping-OCR automatically — no cables, no manual transfers.
🔍 Choose Your Method
Bookkeeping-OCR points to any folder on your computer for new receipts. These guides show you how to scan a receipt on your phone and have it appear in that folder automatically — ready to process.
| Method | Best for | Free Storage |
|---|---|---|
| iCloud | iPhone users with a Mac or Windows PC | 5 GB |
| OneDrive | iPhone or Android, Mac or Windows PC | 5 GB |
| Google Drive | iPhone or Android, Mac or Windows PC | 15 GB |
| Free 3rd Party Apps | Users who prefer an alternative app | Varies |
All three cloud services are free. No paid subscription needed. We are not affiliated with Apple, Microsoft, or Google.
iCloud is built into every iPhone. No app to download — everything you need is already there.
What you need
- iPhone (any model running iOS 13 or later)
- A free Apple ID (you already have one if you use an iPhone)
- Mac or Windows PC
Step 1 — Create a receipt folder in iCloud Drive (do this once)

- On your iPhone, open the Files app
- Tap iCloud Drive
- Tap the three dots (•••) in the top right corner
- Tap New Folder
- Name it Bookkeeping Receipts (or any name you prefer)
- Tap Done
Step 2 — Scan a receipt


- Open the Files app and navigate to your Bookkeeping Receipts folder
- Tap the three dots (•••) in the top right corner
- Tap Scan Documents
- Point your camera at the receipt — the app automatically detects the edges
- Tap the shutter button (or let it capture automatically)
- Tap Keep Scan, then tap Save (top right)
- The receipt saves as a PDF directly into your folder
Step 3 — Set up iCloud on your computer
Mac: Your iCloud Drive folder is already in Finder. Look for iCloud Drive in the Finder sidebar — your Bookkeeping Receipts folder appears there within seconds of scanning.
Windows PC:
- Open the Microsoft Store on your PC
- Search for iCloud and click Get
- Open iCloud and sign in with your Apple ID
- Make sure iCloud Drive is checked, then click Apply
- iCloud Drive appears in Windows File Explorer under This PC → iCloud Drive
Step 4 — Point Bookkeeping-OCR to your receipt folder
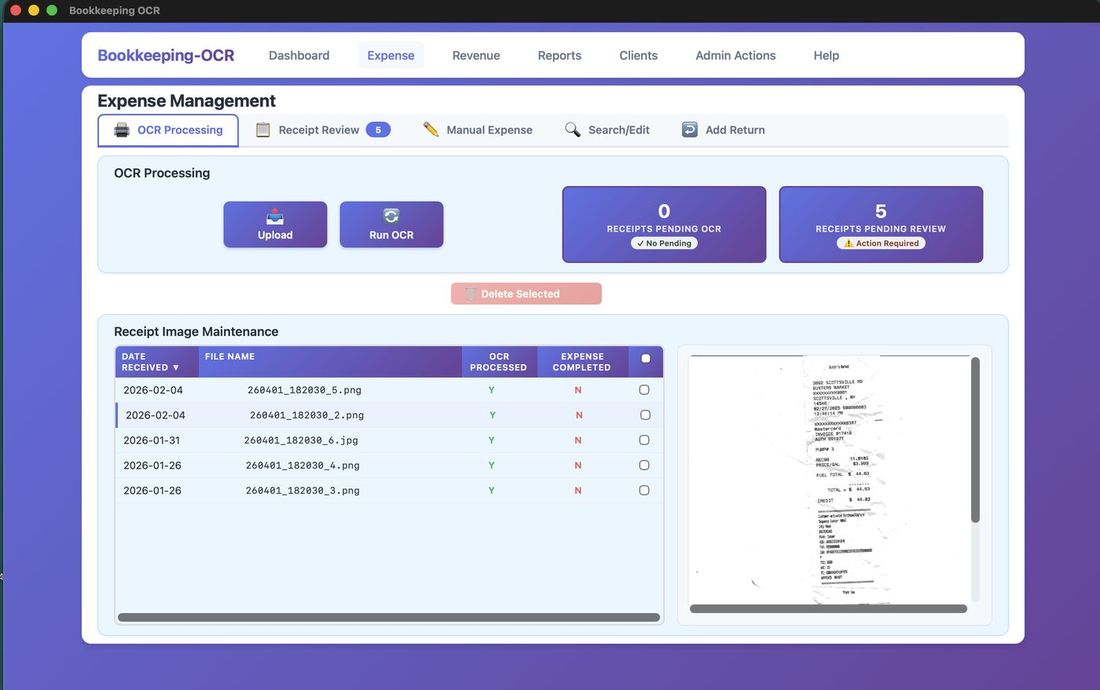
Click Upload on the OCR Processing tab
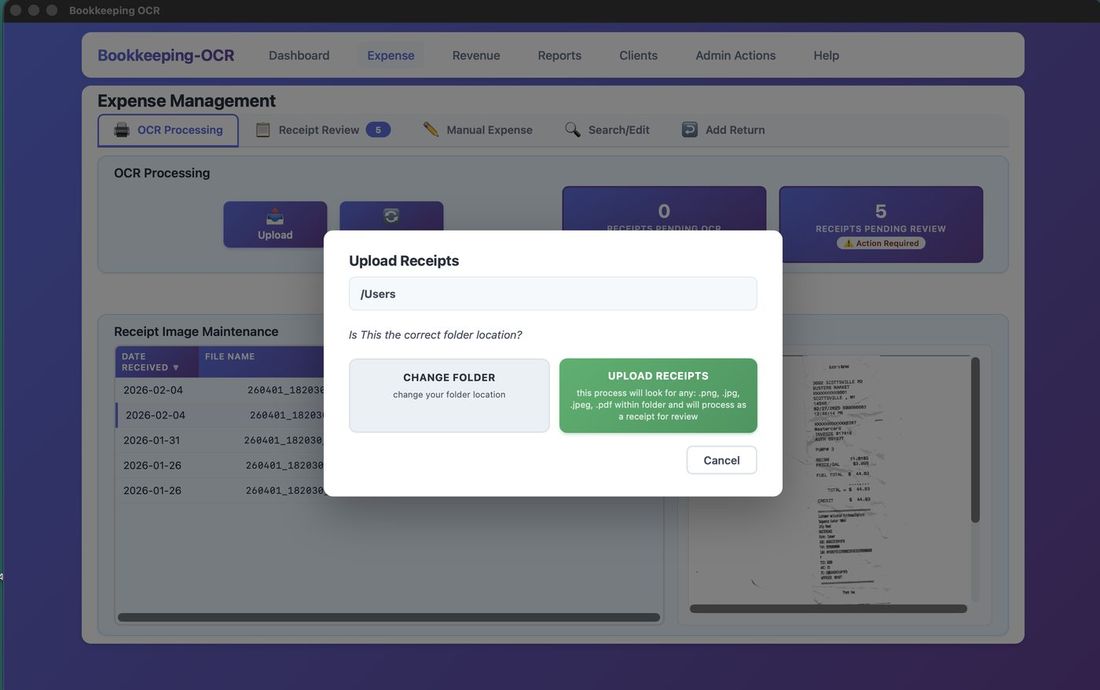
Click Change Folder
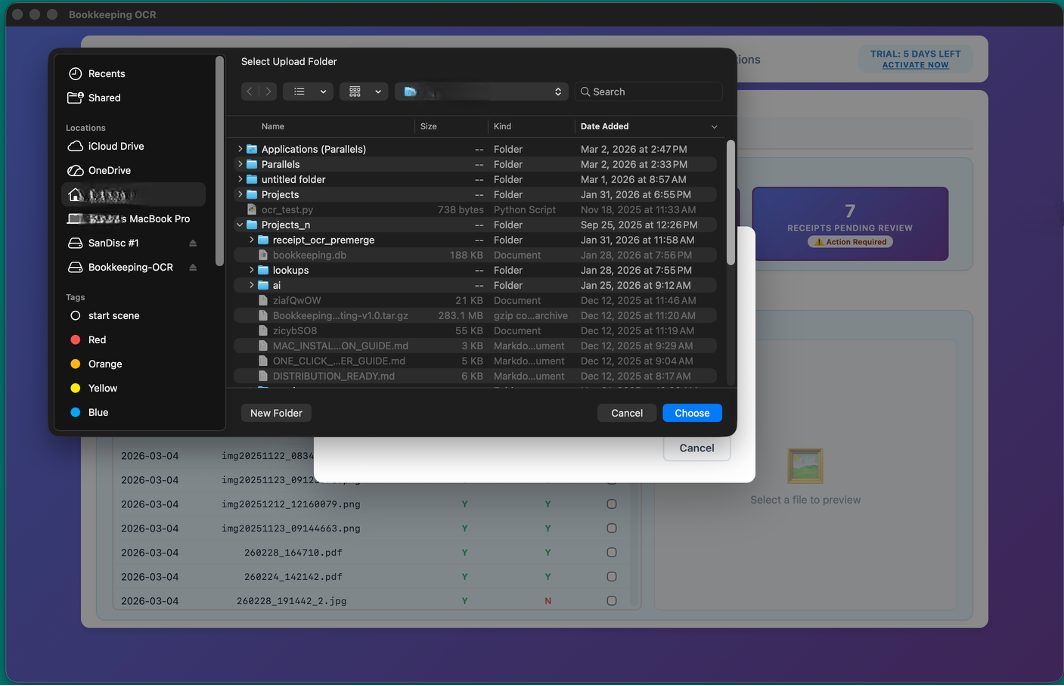
Browse to your iCloud Drive → Bookkeeping Receipts folder and click Choose
- Open Bookkeeping-OCR
- Click Expense in the top menu
- Click the OCR Processing tab
- Click Upload
- Click Change Folder
- Browse to your iCloud Drive → Bookkeeping Receipts folder
- Click Choose (Mac) or Select Folder (Windows)
OneDrive is a free cloud storage service from Microsoft with a document scanner built directly into the app.
What you need
- iPhone or Android phone
- A free Microsoft account (create one at outlook.com — takes 2 minutes)
- Mac or Windows PC
Step 1 — Install OneDrive on your phone

iPhone:
- Open the App Store
- Search Microsoft OneDrive and tap Get
- Sign in with your Microsoft account
Android:
- Open the Google Play Store
- Search Microsoft OneDrive and tap Install
- Sign in with your Microsoft account
Step 2 — Create a receipt folder in OneDrive (do this once)
- In the OneDrive app, tap Files at the bottom
- Tap the + (plus) button
- Tap New Folder, name it Bookkeeping Receipts
- Tap Create
Step 3 — Scan a receipt

- Navigate to your Bookkeeping Receipts folder
- Tap the + (plus) button
- Tap Scan
- Point your camera at the receipt
- Tap the shutter button
- Tap Confirm, choose PDF or JPG
- Tap Save — uploads immediately
Step 4 — Set up OneDrive on your computer

Mac:
- Open the App Store, search Microsoft OneDrive, click Get
- Sign in with your Microsoft account
- OneDrive creates a folder at
/Users/YourName/OneDrive
Windows PC: OneDrive is already installed. Click the OneDrive cloud icon in the system tray and sign in. Your OneDrive folder appears in File Explorer automatically.
Step 5 — Point Bookkeeping-OCR to your receipt folder
- Open Bookkeeping-OCR
- Click Expense in the top menu
- Click the OCR Processing tab
- Click Upload
- Click Change Folder
- Browse to your OneDrive → Bookkeeping Receipts folder
- Click Choose (Mac) or Select Folder (Windows)
Google Drive is a free cloud storage service from Google. If you have a Gmail address you already have a Google account — and 15 GB of free storage, the most of any option on this page.
What you need
- iPhone or Android phone
- A free Google account (your Gmail address works)
- Mac or Windows PC
Step 1 — Install Google Drive on your phone

iPhone:
- Open the App Store
- Search Google Drive and tap Get
- Sign in with your Google account
Android: Google Drive is already installed on most Android phones. Search for it in your app drawer and sign in with your Google account.
Step 2 — Create a receipt folder in Google Drive (do this once)
- In the Google Drive app, tap the + (plus) button
- Tap New Folder, name it Bookkeeping Receipts
- Tap Create
Step 3 — Scan a receipt

- Navigate to your Bookkeeping Receipts folder
- Tap the + (plus) button
- Tap Scan
- Point your camera at the receipt
- Tap the shutter button
- Review the scan and tap Done
- The receipt saves as a PDF to your folder
Step 4 — Set up Google Drive on your computer
Google Drive folder visible in Finder / File Explorer
Mac and Windows (same steps):
- Go to drive.google.com in your browser
- Click Download Drive for Desktop (bottom left)
- Install and sign in with your Google account
- Google Drive creates a local folder:
Mac:/Users/YourName/Google Drive
Windows:C:\Users\YourName\Google Drive
Step 5 — Point Bookkeeping-OCR to your receipt folder
- Open Bookkeeping-OCR
- Click Expense in the top menu
- Click the OCR Processing tab
- Click Upload
- Click Change Folder
- Browse to your Google Drive → Bookkeeping Receipts folder
- Click Choose (Mac) or Select Folder (Windows)
If you already use a scanning app you like, or prefer an alternative to iCloud, OneDrive, or Google Drive, there are many free scanning applications available for both iPhone and Android. Most offer a free tier that is more than sufficient for scanning receipts.
How to use a 3rd party app with Bookkeeping-OCR
- Configure the app to save scans to a cloud storage folder (iCloud, OneDrive, Google Drive, or Dropbox)
- Install that cloud service's desktop app on your computer
- Point Bookkeeping-OCR's import folder to the synced local folder using the steps shown above
Any app that can save a scan as a PDF, JPG, or PNG file to a synced folder will work with Bookkeeping-OCR.
📷 Tips for the Best Scan Quality
Applies to all methods.
- Lay the receipt flat on a dark surface — the contrast helps edge detection
- Make sure the entire receipt is in the frame before shooting
- Use good, even lighting — avoid shadows across the receipt
- If a receipt is crumpled, flatten it as much as possible first
- Hold the phone still and parallel to the receipt — avoid shooting at an angle
- Clean your camera lens if scans look blurry or hazy
Supported file formats: PDF, JPG, JPEG, PNG
Need More Help?
Check out our FAQ for detailed answers, or contact support directly.