Bookkeeping-OCR User Guide
Everything you need to get started and master every feature of your Bookkeeping-OCR application.
🚀 Getting Started
Step 1 — Start Your Free Trial
Visit bookkeeping-ocr.com and click Start Free Trial on the pricing page.

Step 2 — Request Your Download Link
All you need is a valid email address:
- Enter your email address in the form.
- Choose your operating system: macOS 10.13 (High Sierra) or later, or Windows 10 (Build 1909) or later.
- Click "Send me a download link."
- The screen will update to confirm the email has been sent.
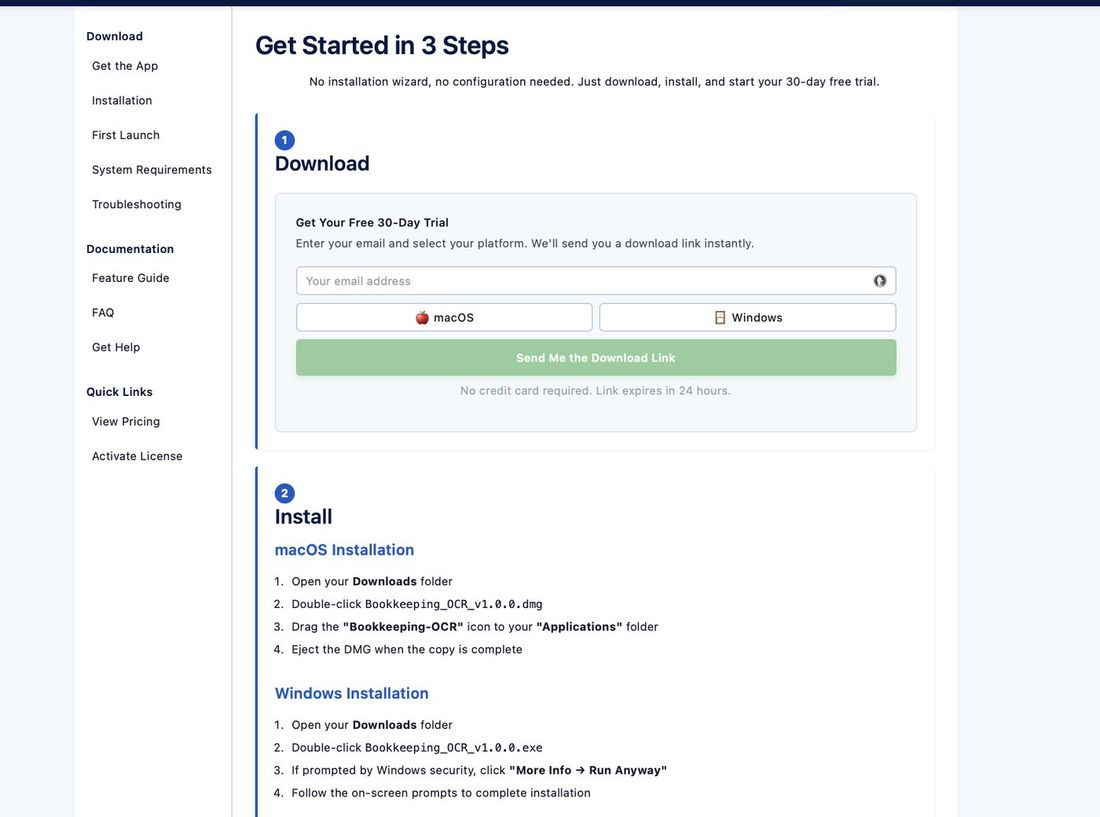
Step 3 — Install the Application
The email will be received within a few minutes and will contain a download link. Click the link and the download will begin.
Run the installer from your Downloads folder, or any location with administrative rights. Follow the on-screen prompts to complete installation.
🍎 macOS
Open Launchpad — the icon appears alphabetically in your application list.
🪟 Windows
A new icon will appear on your Desktop.
Step 4 — Welcome Screen
Upon opening for the first time, you will see a Welcome screen describing the application's features. Scroll to the bottom to find a checkbox that suppresses it on future launches. This information is also available from the Help menu.
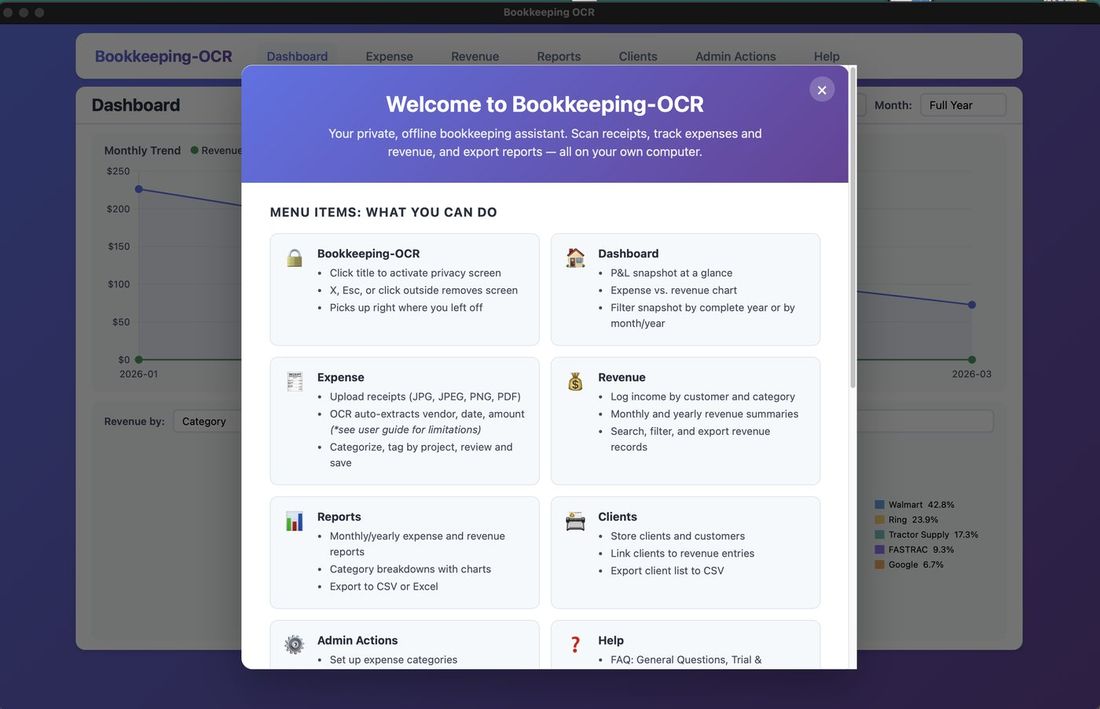
NOTE: Throughout the application on most screens you will find a button. When clicked, the User Guide will open in its own window that you can relocate alongside the application to review how-to's while you work.
🔒 Menu 1 — Security Cover Screen
Clicking "Bookkeeping-OCR" in the upper-left corner applies a Security Cover Screen over the entire window, obscuring any sensitive financial data.
To dismiss it, click anywhere on the cover screen to return to your previous location, or click any menu item to navigate directly there.

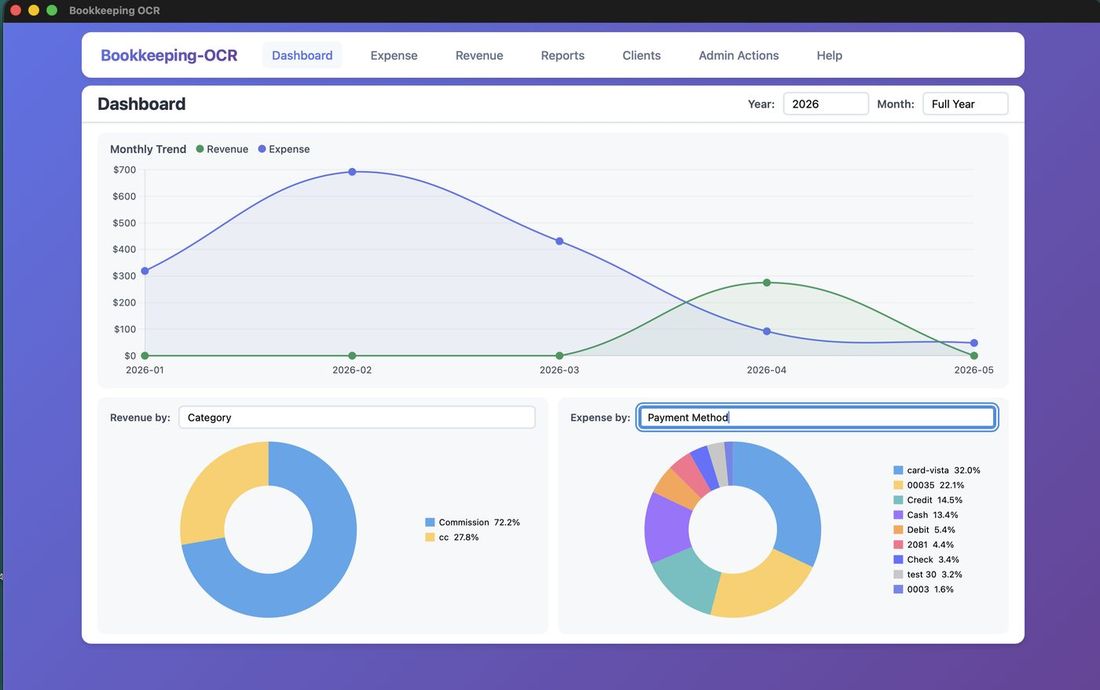
📈 Menu 2 — Dashboard
The Dashboard provides a visual summary of your financial activity:
- Expense and Revenue bar graph
- Revenue pie chart — filterable by Category, Product, Client, Payment Method, or Project
- Expense pie chart — filterable by Vendor, Payment Method, Category, or Project
- Filter by year or month using the controls at the top
💳 Menu 3 — Expense Management
OCR Processing — Uploading Receipts
Step 1 — Click Upload
On the OCR Processing tab, click the Upload button to begin.
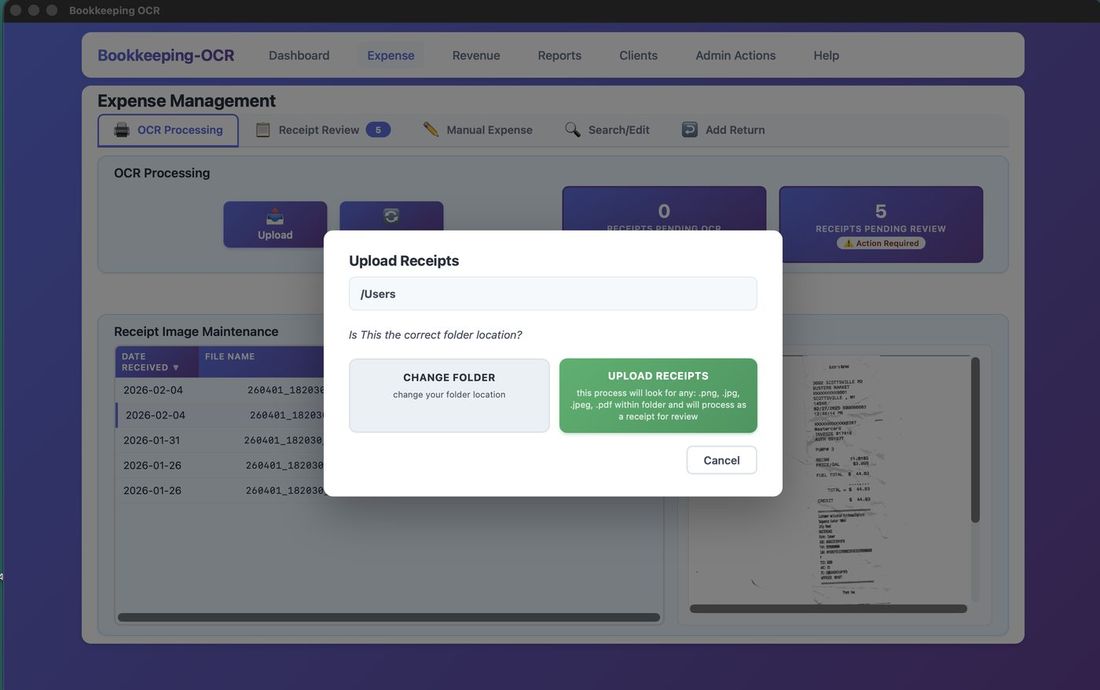
Step 2 — Click 'Change Folder'
Click Change Folder to point the application to your receipt images folder.
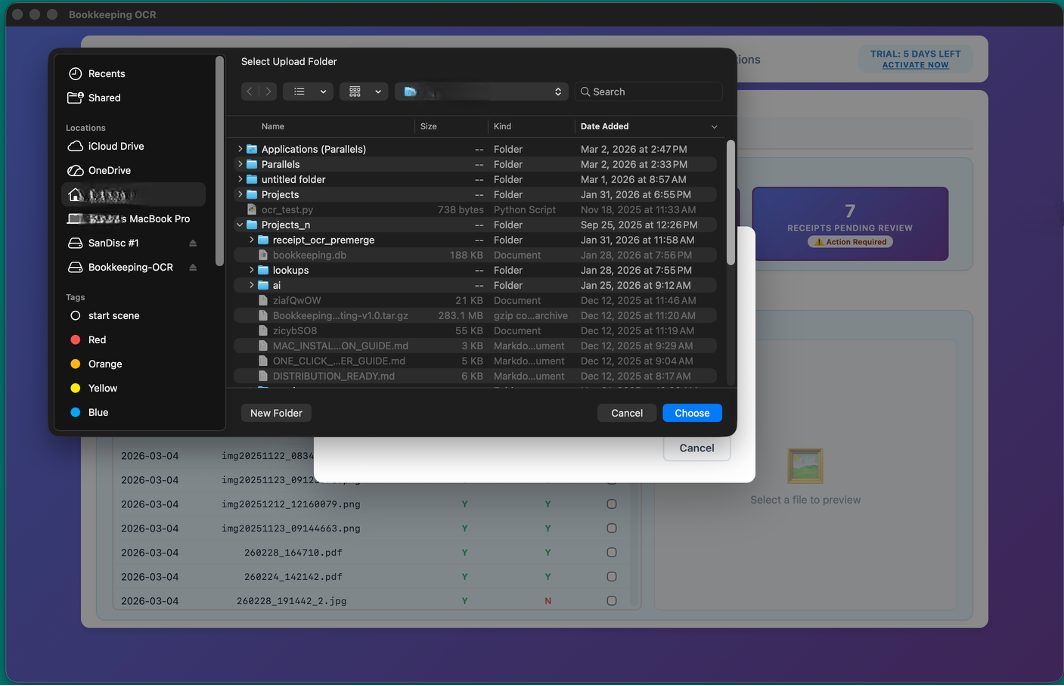
Step 3 — Choose Your Receipt Folder
Browse to and select the folder where your receipt image files are stored.
Step 4 — Click 'Upload Receipts'
Click Upload Receipts to copy the images into the application.

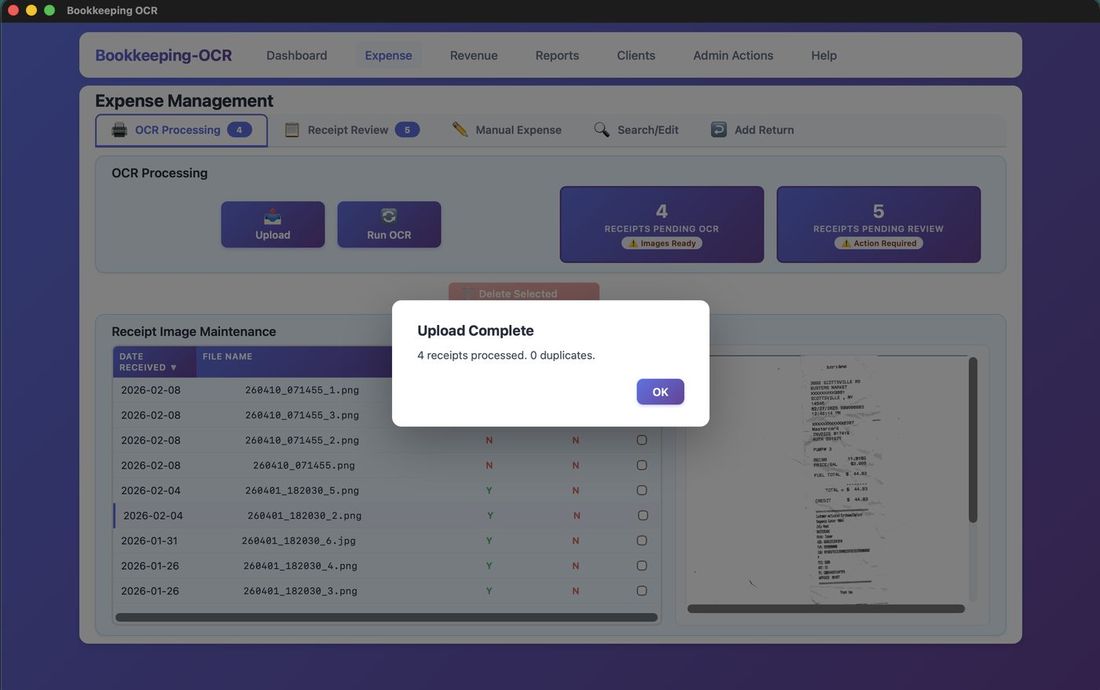
Step 5 — Receipts Are Renamed
Each receipt is copied and automatically renamed with a timestamp (YYYYMMDDMMSS) for unique file names.
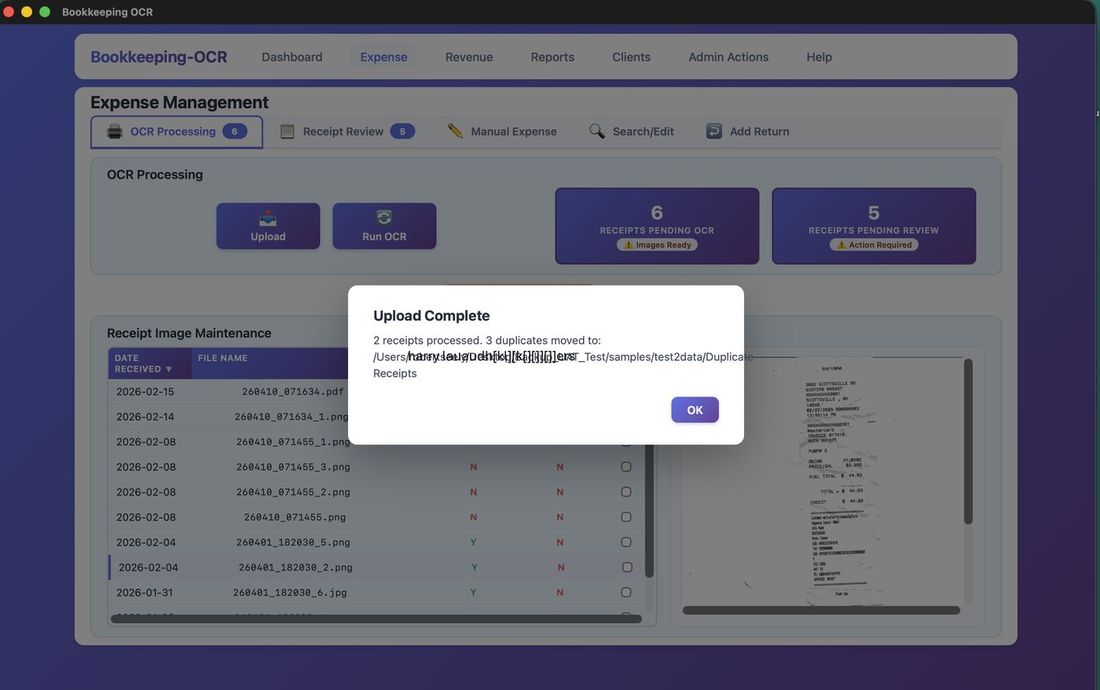
Step 6 — Duplicate Detection
Re-uploaded receipts are flagged as duplicates and moved to a Duplicates folder. To reprocess a receipt, rename the file before uploading again.
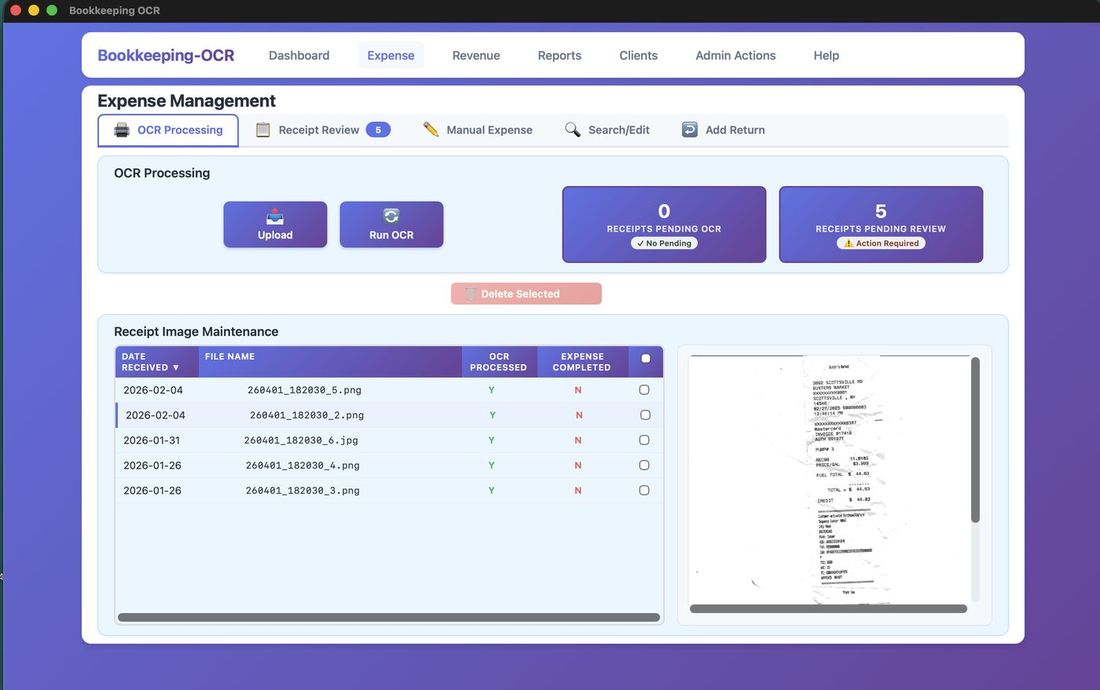
OCR Processing — Running OCR
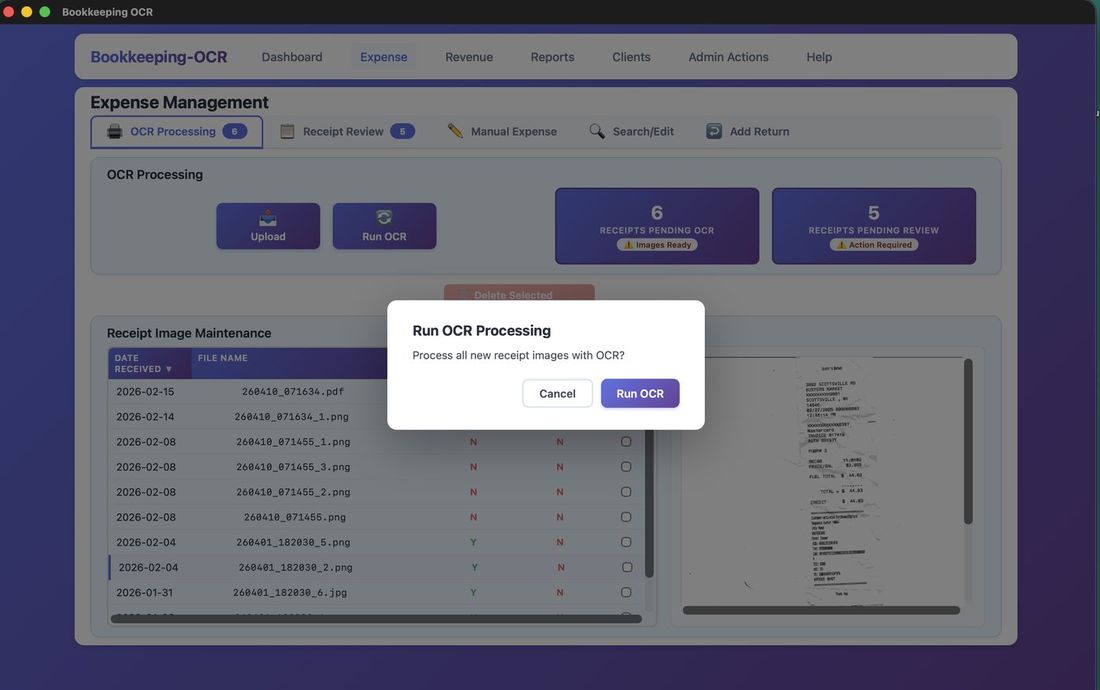
Step 1 — Click 'Run OCR'
Click Run OCR to begin processing all staged receipts.

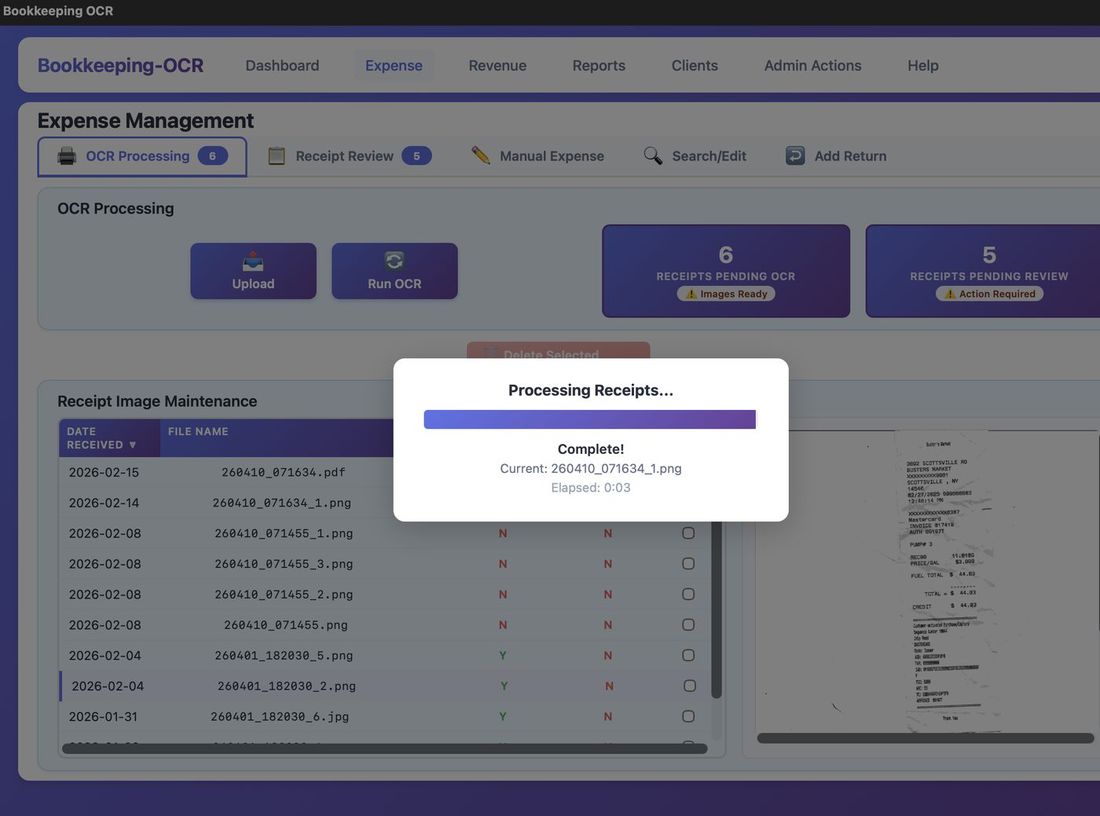
Step 2 — Processing in Progress
The application scans each receipt image in sequence.
Step 3 — Data Extracted
OCR extracts Vendor, Total Amount, and Date. Accuracy depends on receipt clarity. The receipt image is shown during Review so data can be corrected. After the initial scan the process is paperless.
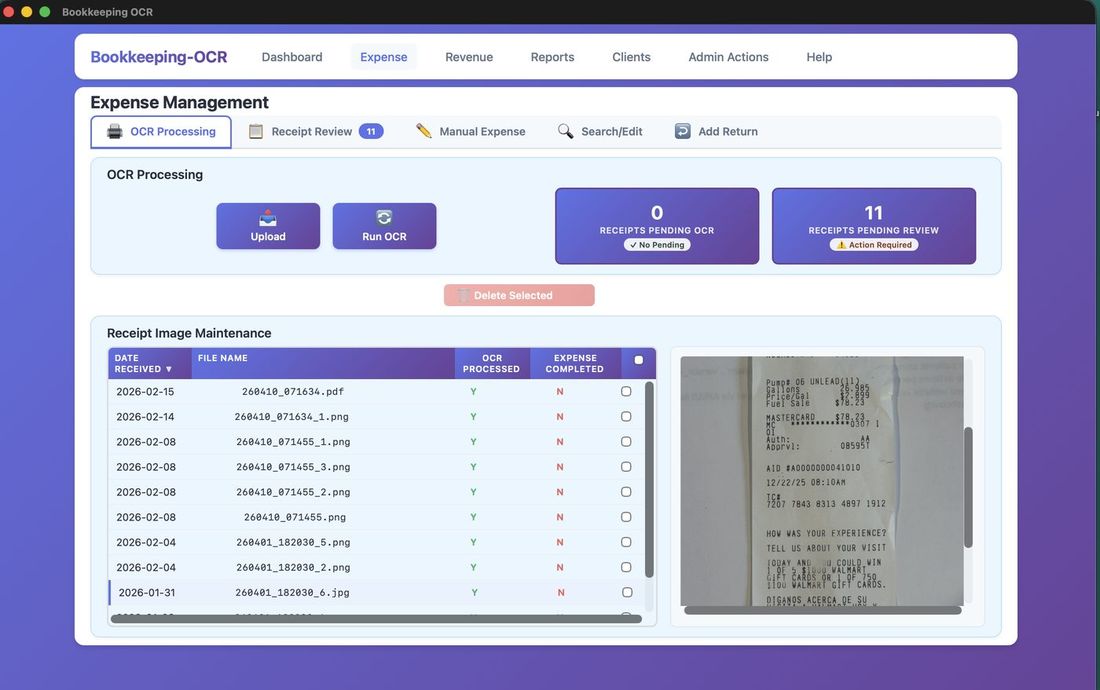
Receipt Image Maintenance
The Receipt Image Maintenance list shows all receipts that are uploaded and pending review. Once a receipt has been fully processed and saved as a completed expense, it is removed from this list automatically. Highlight any row to show the receipt image.
| OCR Processed Value | Meaning |
|---|---|
| Y | Processed — awaiting Receipt Review |
| N | Uploaded, not yet OCR'd |
| U | Unreadable or corrupted image |
Deleting: Check the checkbox to mark for deletion. The Delete Selected button activates with a count. Deleting a receipt here removes the image and OCR data only — the receipt has not yet been saved as an expense record.
Receipt Review
Navigating: Receipts are presented in processing order. Use the Select Receipt dropdown to jump to any pending receipt. Tabbing moves left to right, top to bottom, back to Vendor.
Date field — Windows: Use arrow keys between day/month/year. Mac: clicking opens a calendar.
Dropdowns are available for: Vendor, Payment Method, Category, and Project.

Fields & Line Splits
Fields marked * are required. Receipt images can be zoomed for closer viewing.
Line Item Splits: Every receipt needs at least one line item. Click + Add Line to split across multiple categories/amounts. Each line has Category, Project, Amount, and Notes.
The Sum field shows remaining unallocated balance. Hover over Notes to see full text. Unchecking a line item excludes it from the total.
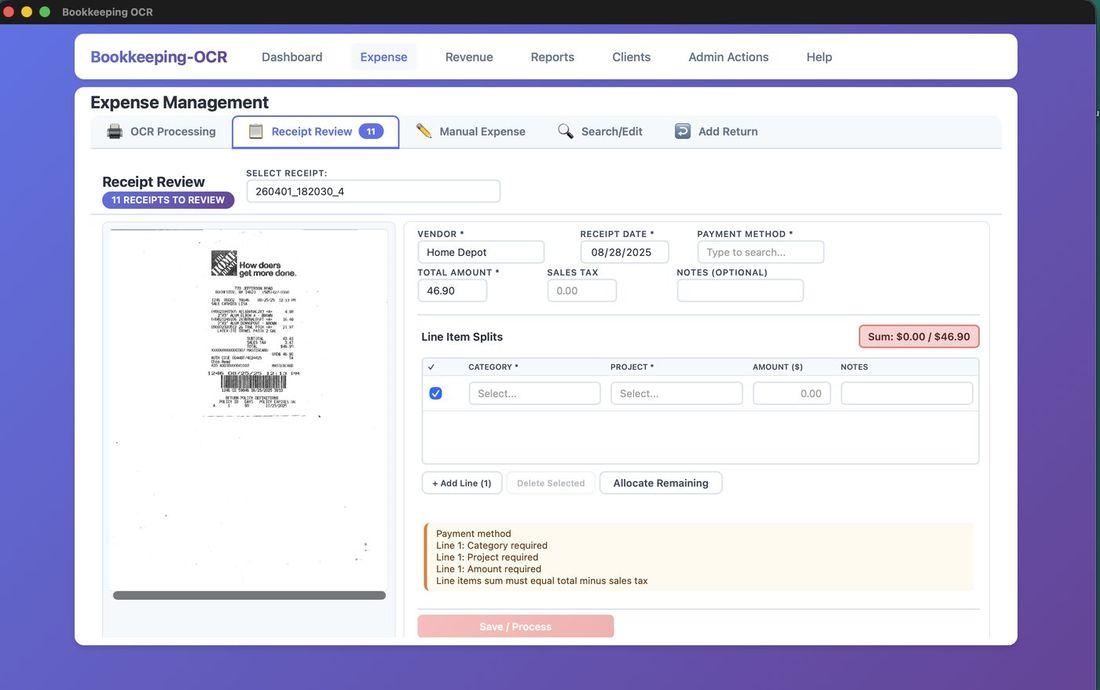
Allocate Remaining
Click Allocate Remaining to fill the outstanding balance into the Amount field. Clicking it a second time saves the receipt if all required fields are complete.
Pressing Enter in the Amount field also triggers Allocate Remaining. Pressing Enter again saves the record.
If Sales Tax is populated, allocation = Total Amount minus Sales Tax. Multiple empty Amount fields split the balance equally. One empty Amount field gets the full remaining balance.
Required Fields & Save
A yellow indicator shows remaining required fields. The Save button turns green when all required fields are complete — the record cannot be saved before that point.
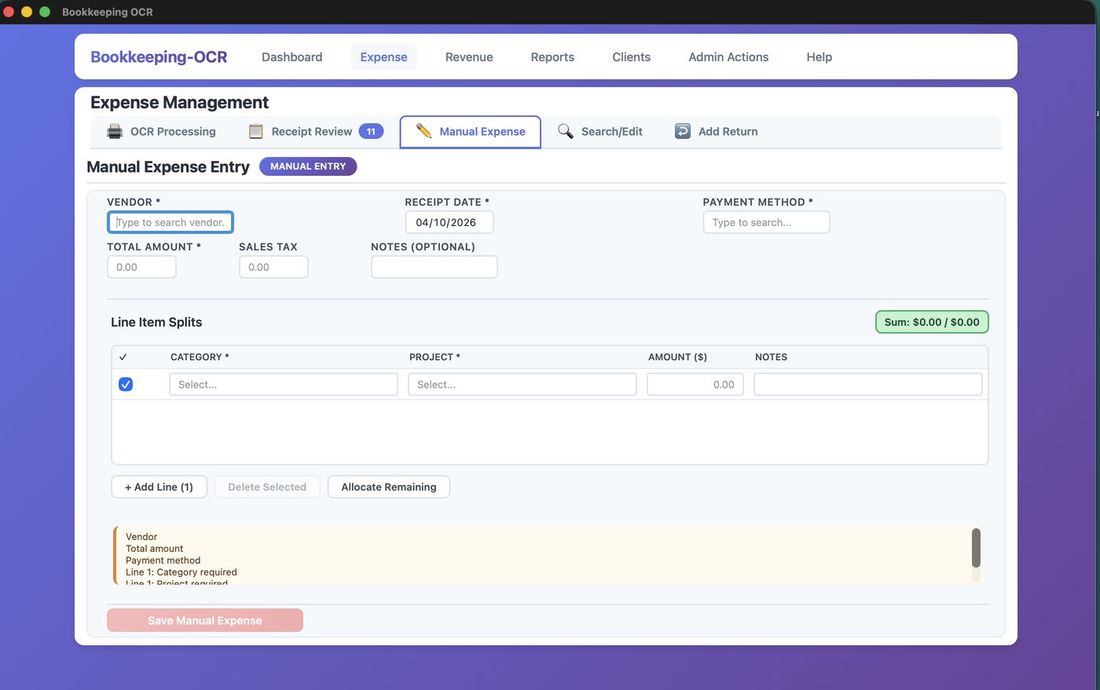
Manual Expense Entry
Manual Expense Entry uses the same layout as Receipt Review — dropdowns, date pickers, line item splits, and Allocate Remaining — but without the receipt image panel.
Required: Vendor, Total Amount, Payment Method, and Receipt Date.
At least one Category, Project, and Amount line item split is required.
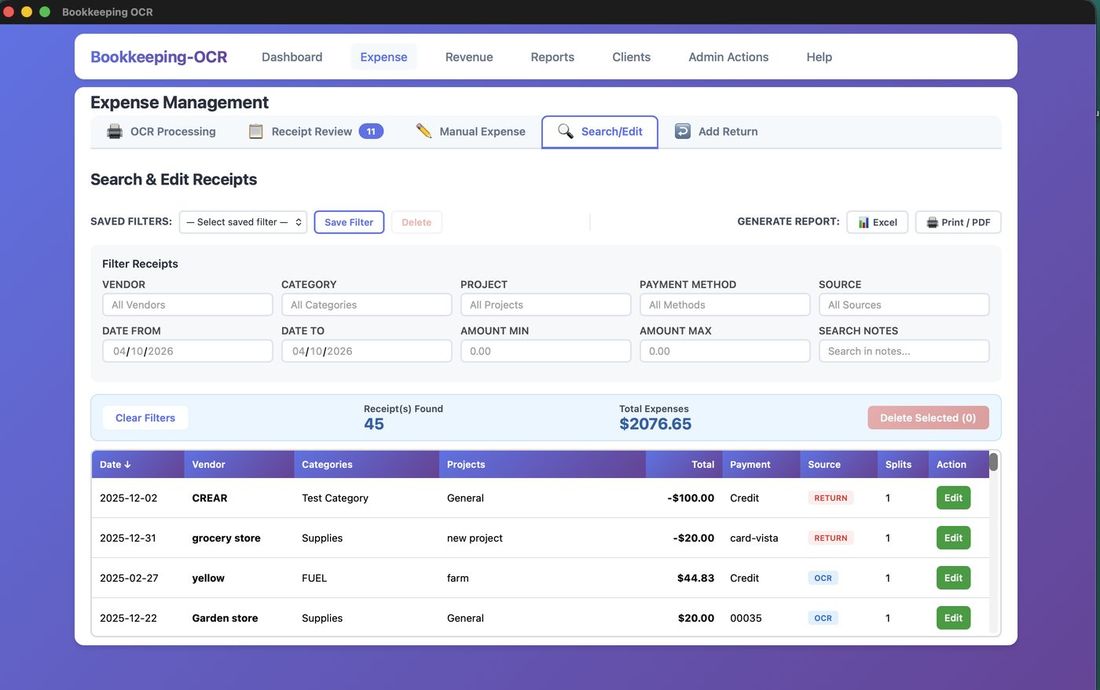
Search & Edit Expenses
The Search/Edit tab displays all saved expense records with powerful filtering. Filter fields include Vendor, Category, Project, Payment Method, Source, Date Range, Amount Range, and Notes.
Filters are dynamic — the list updates as each field is populated. Press Esc to clear all filters.
Saved Filters: After configuring a filter, click Save Filter, name it, and save for future use. Saved filters are available from a dropdown. Any filter can be exported to Excel or printed as a formatted report.

Sorting: Click any column header to sort A–Z, Z–A, or by amount.
Deleting: Click a row to highlight it and activate the Delete button. A confirmation prompt is shown.
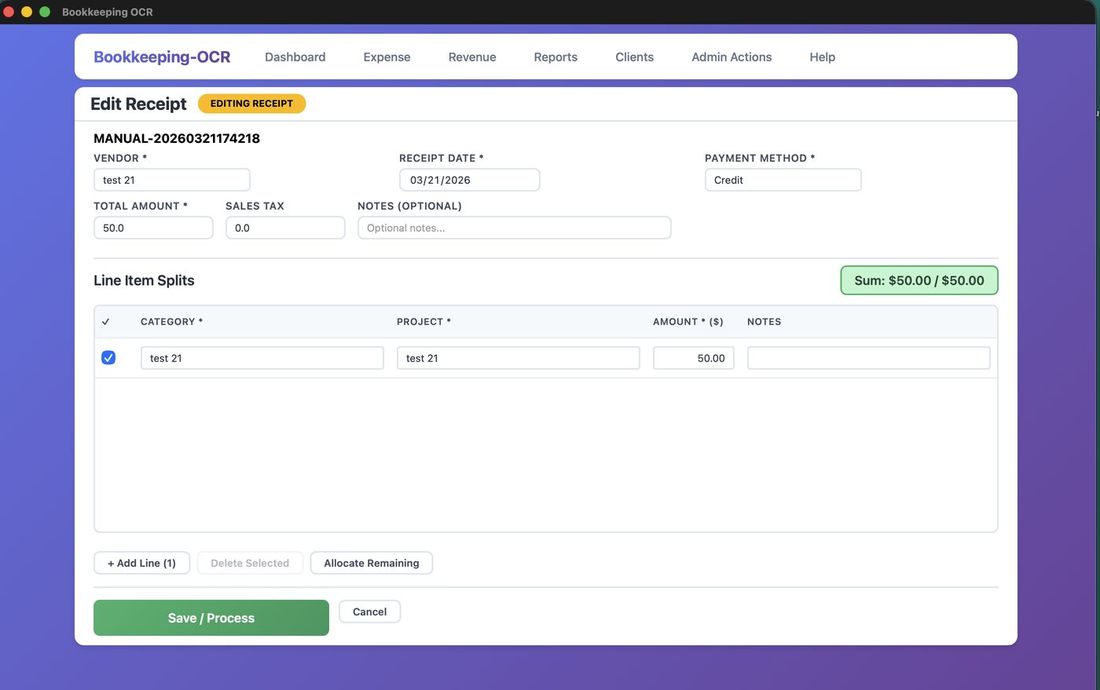
Edit: Click Edit on any line item to open the full Edit Receipt screen.
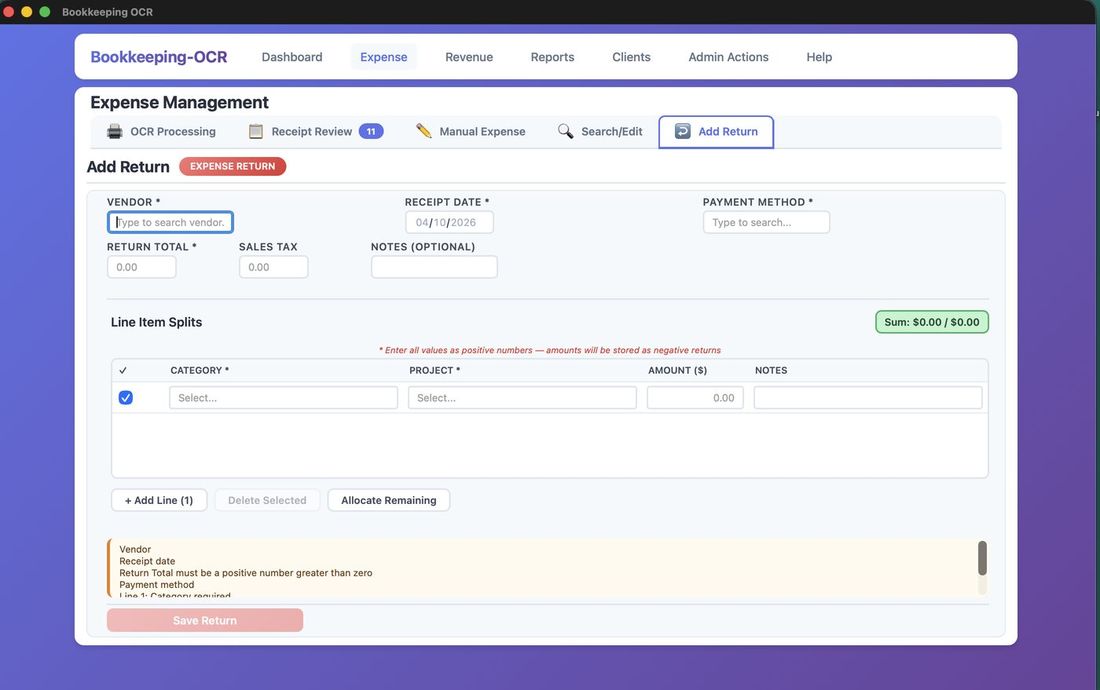
Add Return
The Add Return screen uses the same layout as Receipt Review with the same dropdowns, date pickers, and line item splits.
Return amounts are displayed as positive numbers on screen but stored as negative values in the database.
💵 Menu 4 — Revenue Management
Add Revenue
The Add Revenue screen is organized into a four-column header and a line item table below.
Header Fields
The header uses a consistent four-column layout across all three revenue screens (Add, Edit, Refund):
- Column 1 — Client / Total Revenue / Project: Client (required) is an autocomplete field. When a client is selected, a Tax Exempt badge appears next to their name if the client is marked tax exempt, and the Sales Tax Rate field (column 3, row 2) populates automatically. Total Revenue is the gross amount for this entry. Project is optional.
- Column 2 — Sales Tax: Read-only. Displays the sum of all line item tax amounts. Updates automatically as you enter line items.
- Column 3 — Date / Sales Tax Rate / Reference: Date is required. Sales Tax Rate displays the client's tax rate for reference — it is read-only and populated from the client record. Reference is optional.
- Column 4 — Payment Method / Notes: Payment Method is required. Notes is optional.
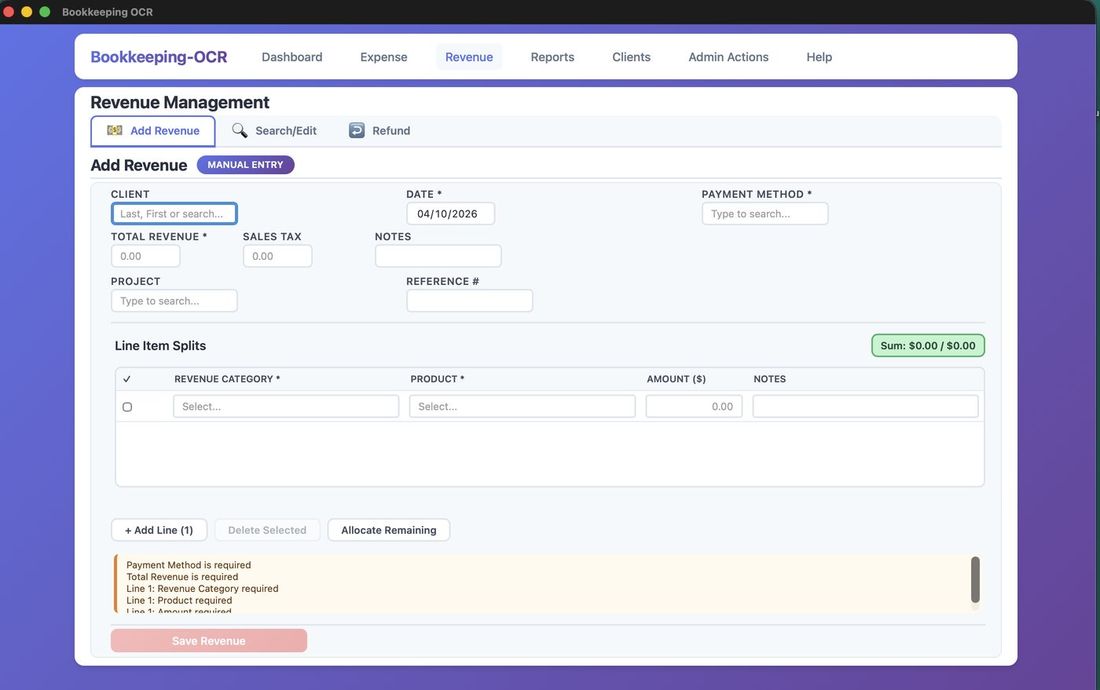
Line Items
Each line item row has five columns: Product, Revenue Category, Amount ($), Tax ($), and Notes.
- Product: Autocomplete. Selecting a product automatically fills the Revenue Category field and sets whether this line is taxable — based on the product's setup in Admin Actions. New products can be typed in and will be added on save.
- Revenue Category: Auto-filled from the product. Can be manually changed if needed.
- Amount ($): The dollar amount for this line. Required on at least one line to save.
- Tax ($): Auto-calculated when a client is selected, the client is not tax exempt, and the product is marked taxable. Calculated as: Amount × Client Tax Rate. Can be manually adjusted — once you type a value, it is treated as manually set and will not be overwritten.
Use + Add Line to add rows. Click a row to select it; the Delete Selected button activates with a count and confirms before deleting.
Allocate Remaining
Allocate Remaining distributes the unallocated portion of Total Revenue across blank line item rows automatically.
- A client must be selected — tax cannot be calculated without one.
- Each line that should receive an allocation must have a Product entered. Lines without a product are skipped.
- Total Revenue must be greater than zero.
How tax is handled during allocation:
- If the client is tax exempt, all lines receive their full allocated amount with $0 tax.
- If the product is marked not taxable (set in Admin Actions → Products), that line receives the full amount with $0 tax.
- If both the client and product are taxable, the allocated gross amount is split into net + tax using the client's tax rate. The line amount shows the net, and the tax field shows the tax portion.
- Lines that already have an amount but are missing tax (e.g., entered before a client was selected) have their tax re-derived automatically before any blank lines are filled.
After allocation, click Save Revenue at the bottom to save the entry.
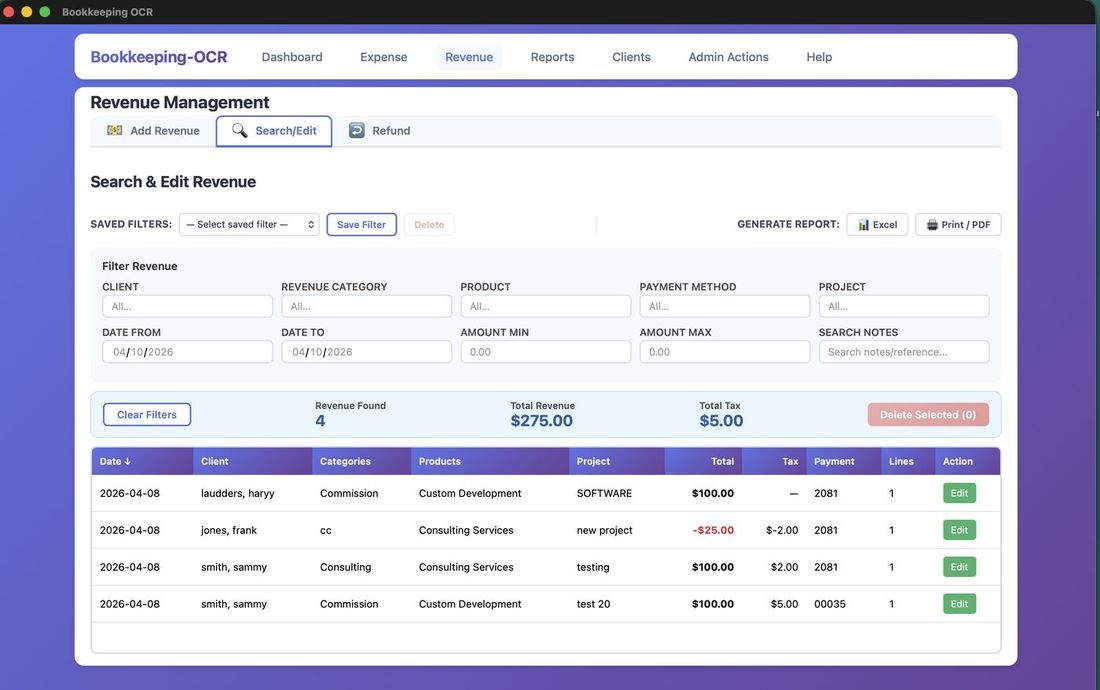
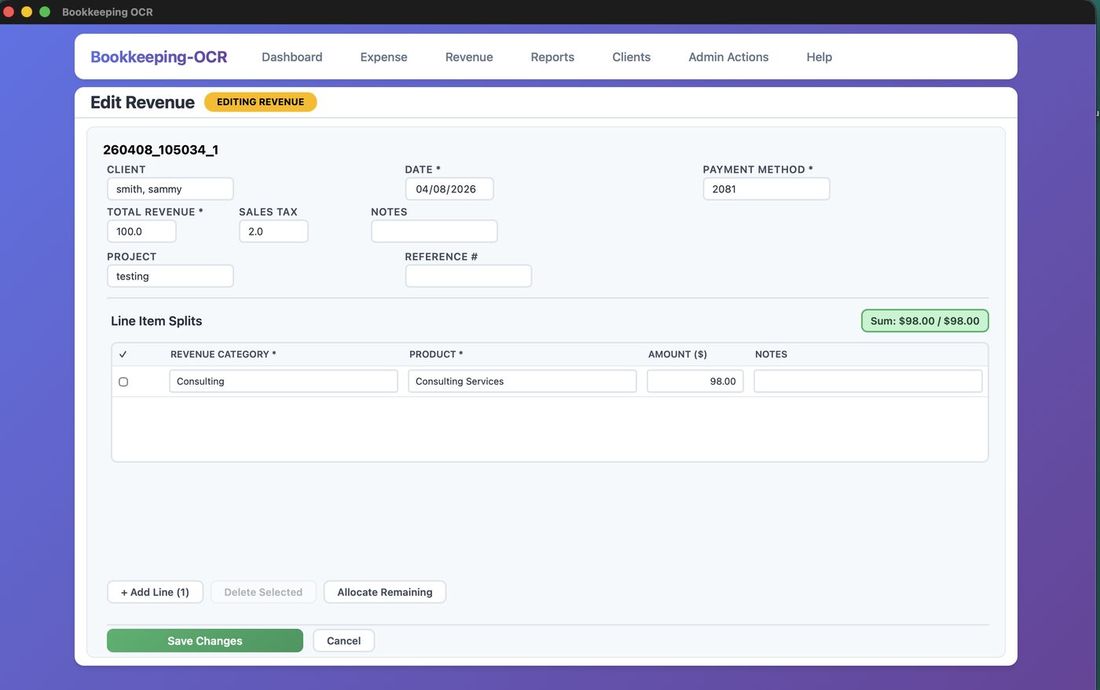
Search & Edit Revenue
Mirrors the Expense Search/Edit screen. Revenue-specific filters: Client, Revenue Category, Product, date range, and amount range.
Filters can be saved and deleted. Any filtered result set can be downloaded to Excel or printed. Clicking Edit on a row opens the Edit Revenue screen, which has the same four-column header and line item layout as Add Revenue — including Allocate Remaining and tax calculation.
Deleting: Click a row to highlight it. The Delete button activates showing the count. A confirmation prompt is shown before deletion.
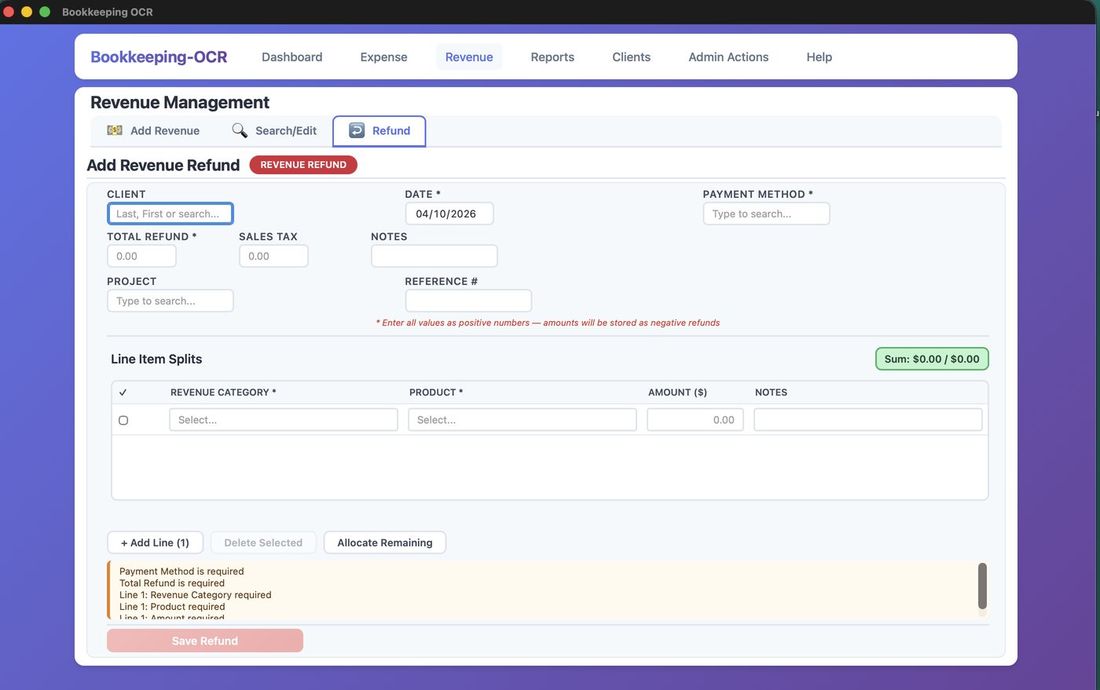
Revenue Refund
Records a refund against a client. The layout is identical to Add Revenue — same four-column header, same line item table, and the same tax-aware Allocate Remaining behavior.
Click Save Revenue at the bottom to save the refund. The button turns green when all required fields are complete.
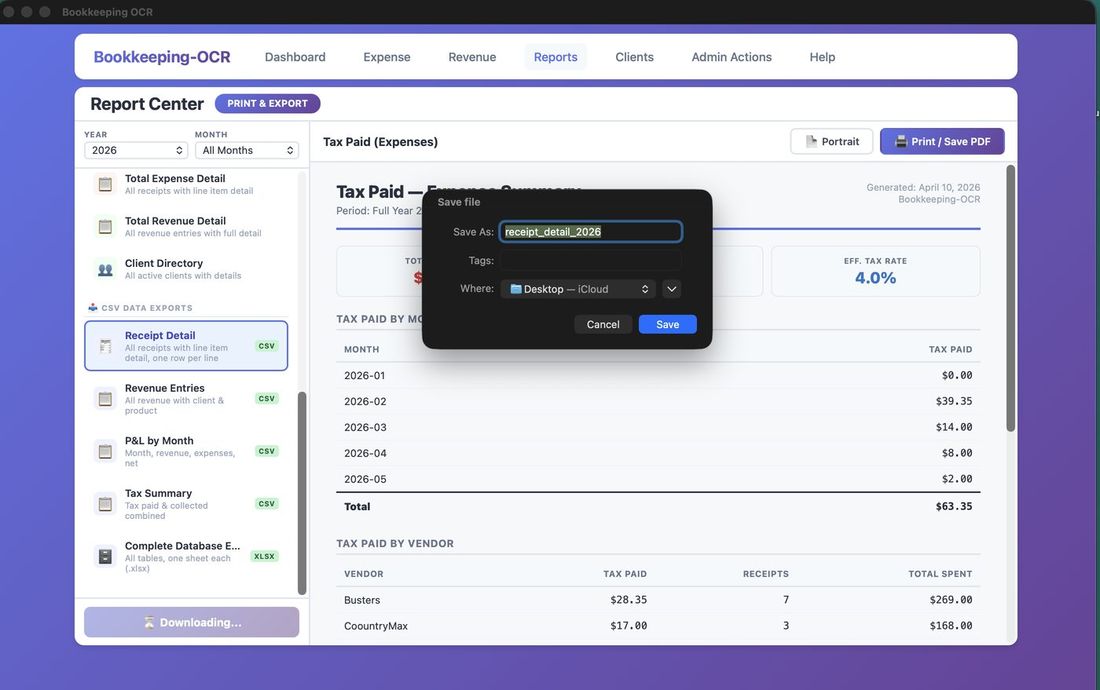
📄 Menu 5 — Reports
Reports generate dynamically — click the desired report and it renders immediately. Each can be printed or saved as a PDF.
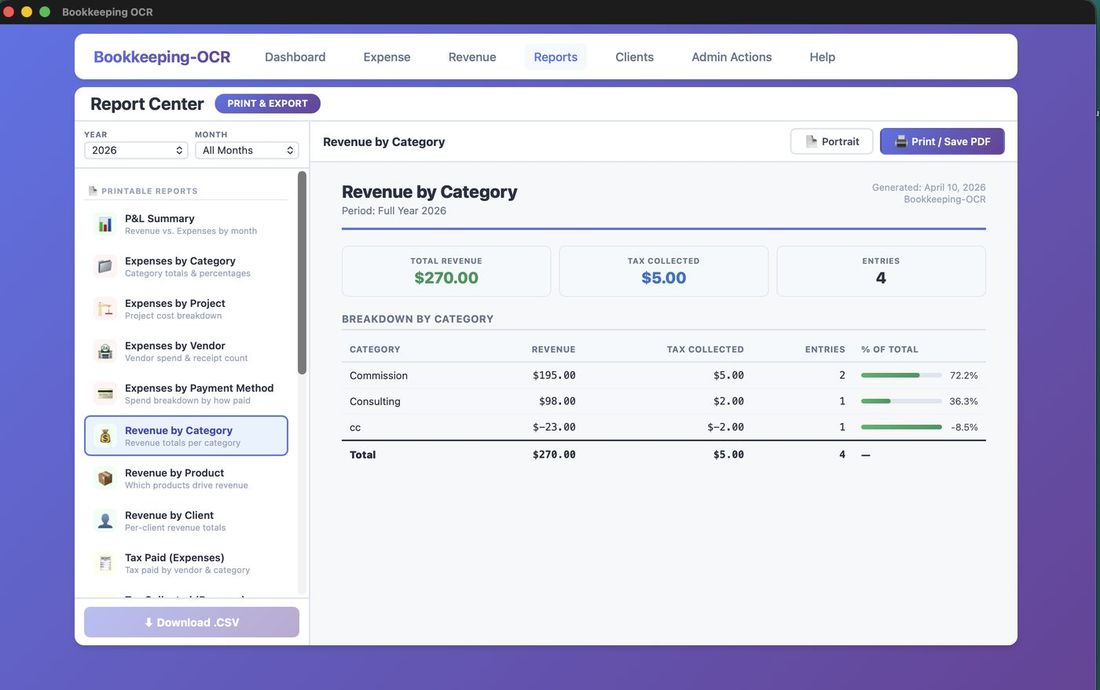
CSV Exports: After selecting a report, the Download .CSV button activates. A Save File As dialog appears — choose destination, optionally rename, and save as a .csv spreadsheet.
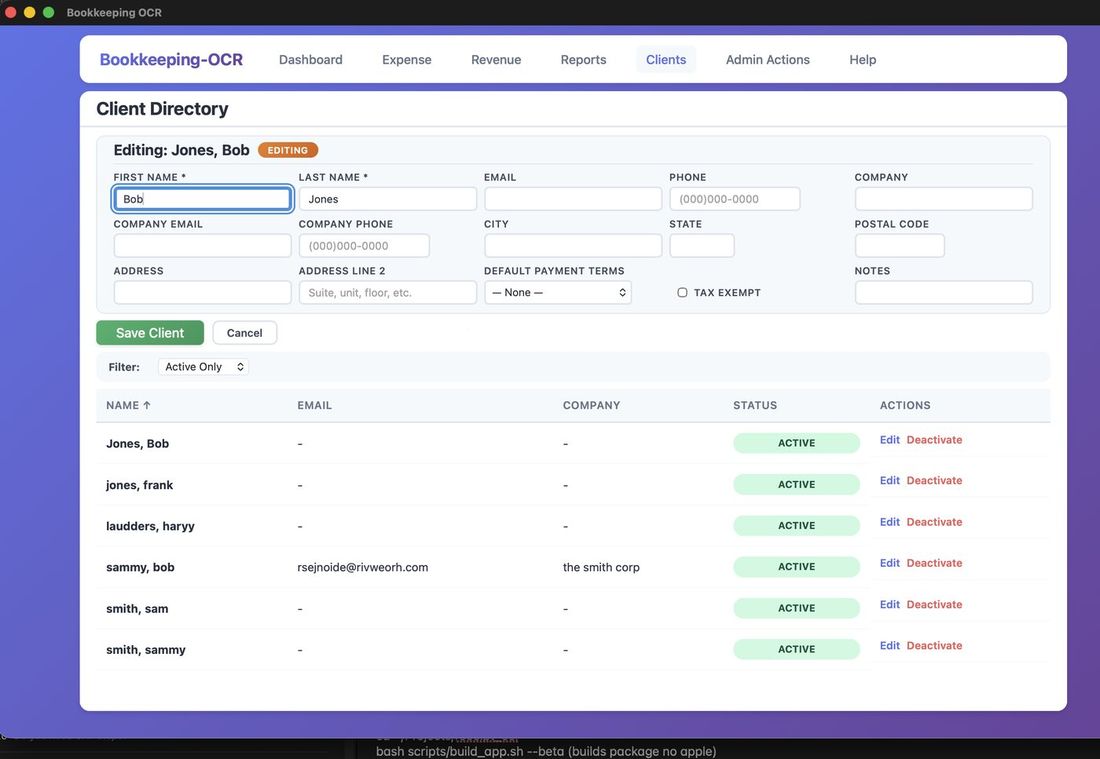
📒 Menu 6 — Clients
The client list has dynamic filtering. As you enter letters or numbers into most fields the list will filter starting with the left-most character (example: entering "b" into First Name will find "Brad" but not "Abby"). There is also a filter for Active, Inactive, or All statuses.

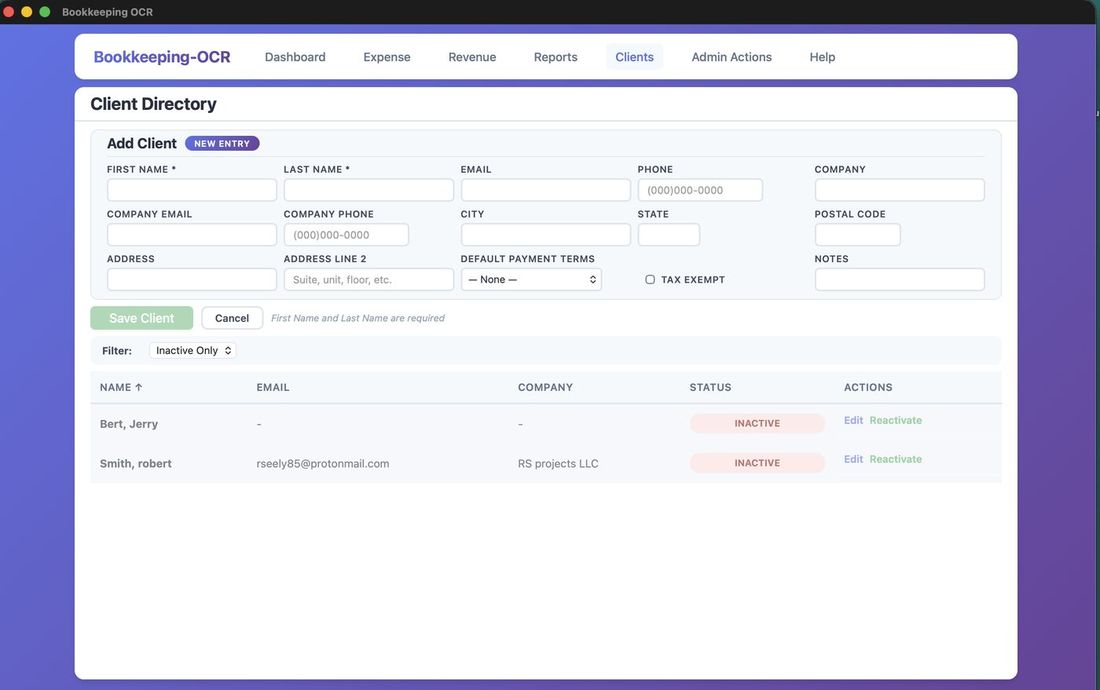
Add New Client
Only First Name and Last Name are required. All other fields are optional. Saving a client will save all information and refresh the screen to add another or filter the list.
Sales Tax Fields
Two fields on the client record control how sales tax is handled across all revenue entries for that client:
- Sales Tax Rate (%): Enter the applicable sales tax rate as a percentage — for example, enter 8.50 for 8.5%. This rate is used to automatically calculate tax on revenue line items when the client and product are both taxable. The rate also displays as a read-only reference field in the header of all three revenue screens (Add Revenue, Edit Revenue, Revenue Refund) whenever this client is selected.
- Tax Exempt: Check this box if the client is exempt from sales tax. When a tax-exempt client is selected on any revenue screen, a Tax Exempt badge appears next to their name and no tax is calculated on any line item — regardless of whether individual products are marked taxable.
Deactivate & Reactivate
Click Deactivate — a confirmation appears in the upper-right corner and the button changes to "Reactivate." Clicking Reactivate restores active status. Deactivated clients do not appear in revenue entry autocomplete dropdowns.
⚙ Menu 7 — Admin Actions
Category Maintenance
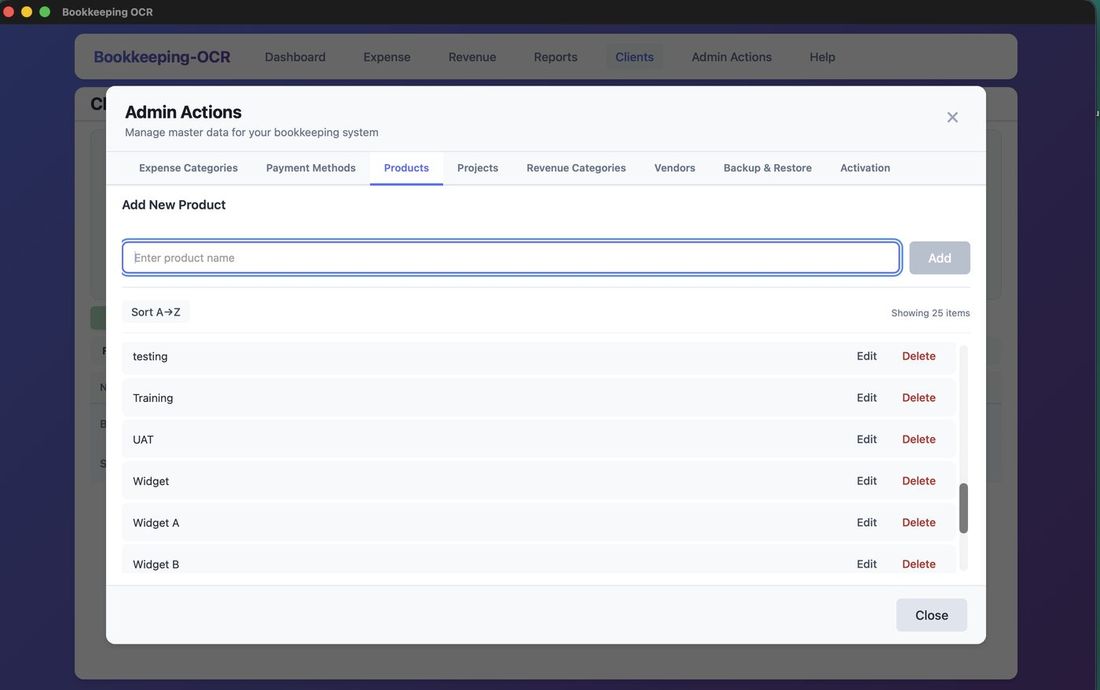
Individual tabs for: Expense Category, Payment Methods, Products, Projects, Revenue Categories.
For all tabs except Products, the workflow is the same:
- Add: Type item name and click Add.
- Edit: Click Edit to make the row editable inline, then save.
- Delete: Opens a Confirm Deletion prompt.
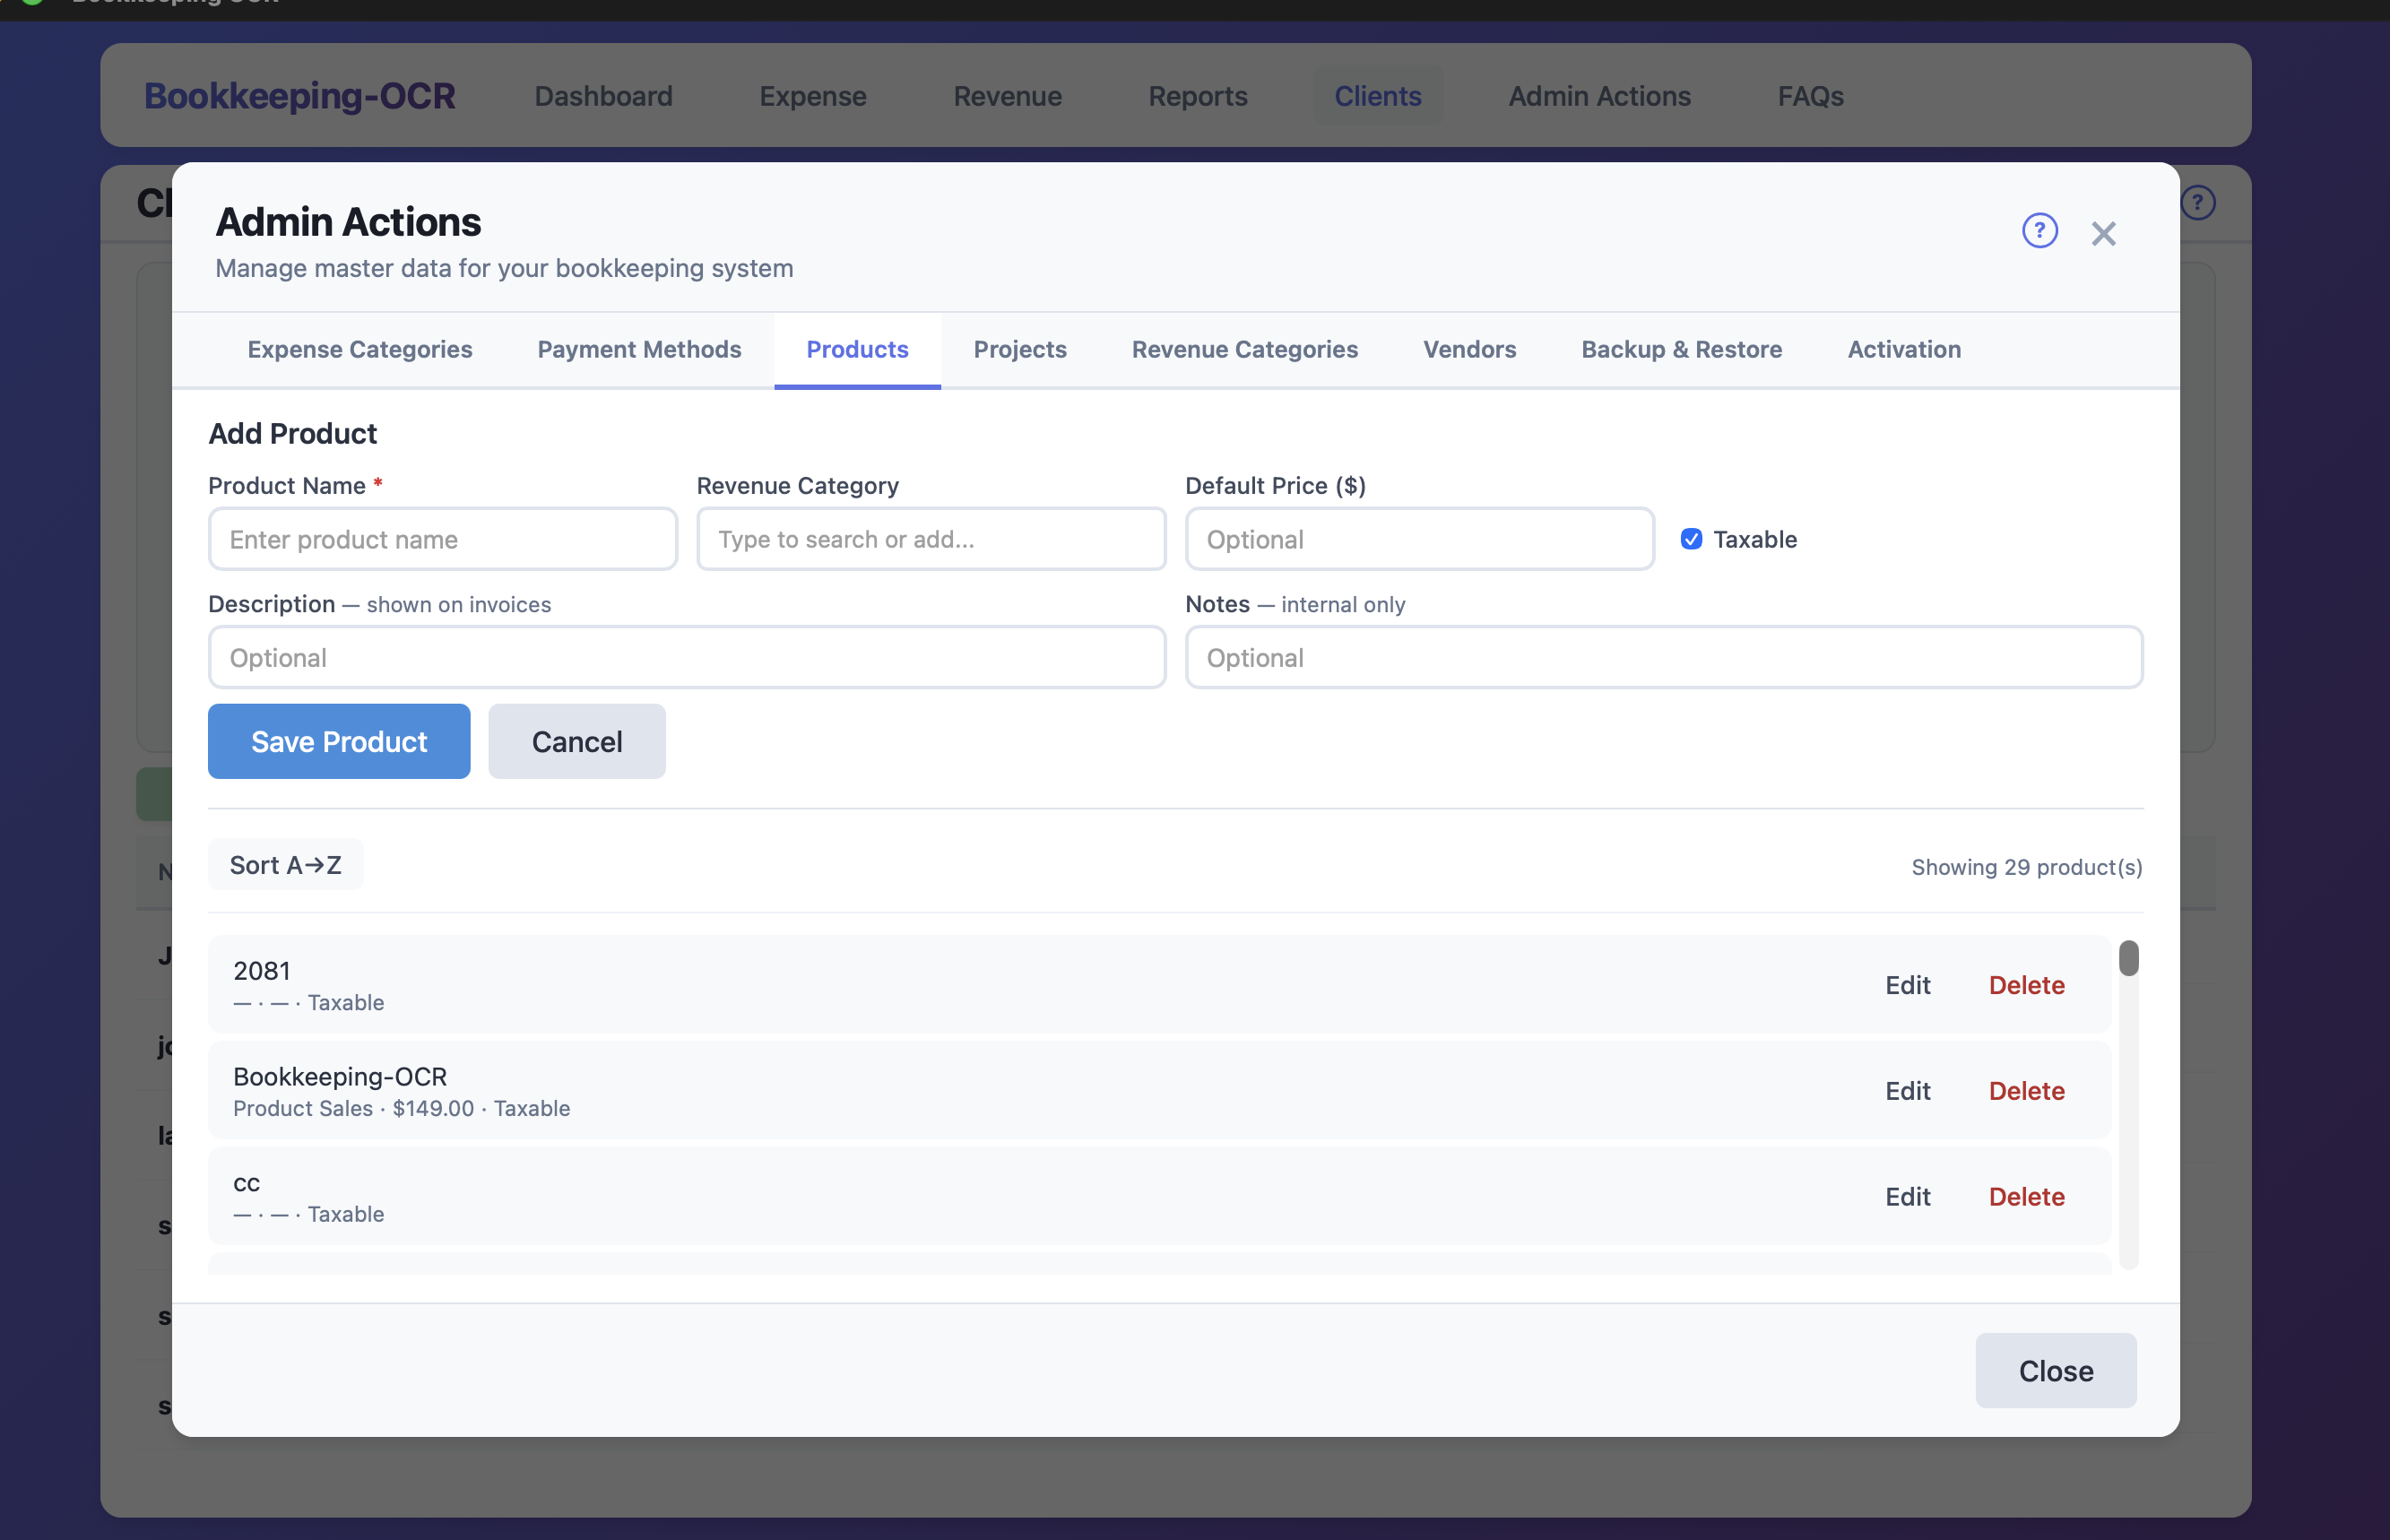
Products
Products are more than just a name — each product carries a Revenue Category and a Taxable flag that drive automatic behavior in the revenue screens.
Product Fields
- Product Name (required): The name that appears in revenue line item dropdowns.
- Revenue Category: The revenue category associated with this product. When you select this product in a revenue line item, the Revenue Category field on that line is filled in automatically. Can be left blank if you prefer to assign categories manually.
- Taxable (checkbox): Controls whether sales tax is calculated for this product. Checked by default. Uncheck for products or services that are not subject to sales tax — for example, labor-only services in jurisdictions where labor is exempt. When a revenue line uses a non-taxable product, the tax field on that line is set to $0 regardless of the client's tax rate.
- Default Price ($): Optional. Reserved for future invoice functionality.
- Description: Optional. Intended to appear on invoices.
- Notes: Optional. Internal use only — not shown to clients.
Vendor Maintenance
Begin typing in the Vendor field — the list filters in real time. If no results appear, the vendor is new. Tabbing away confirms the new vendor will be added on save.
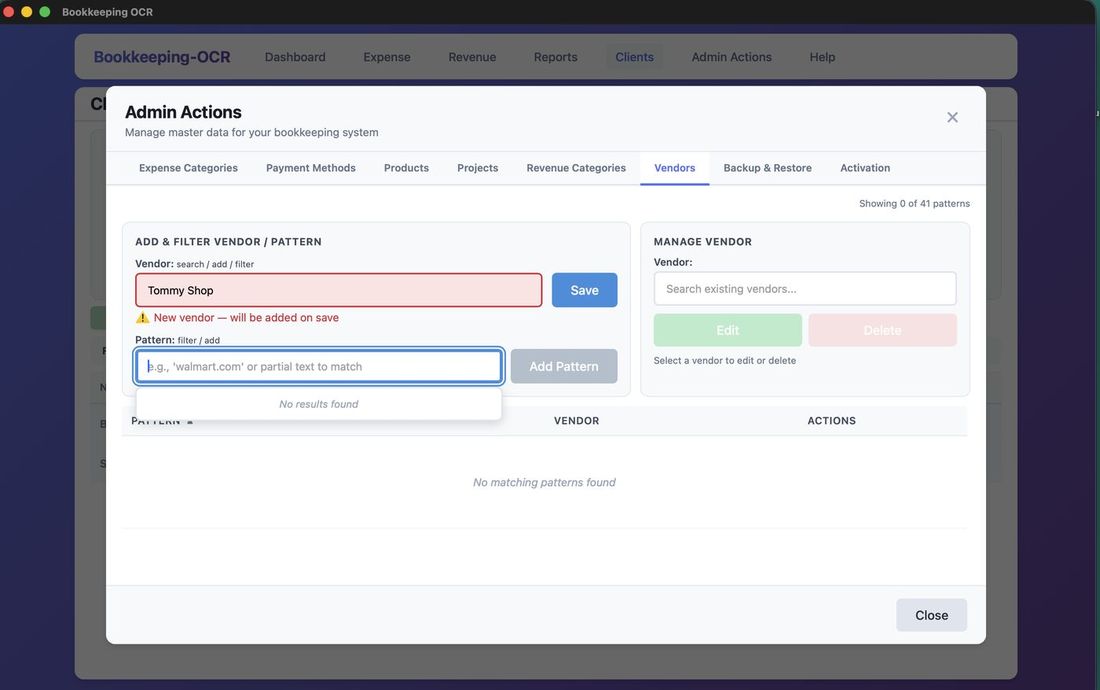
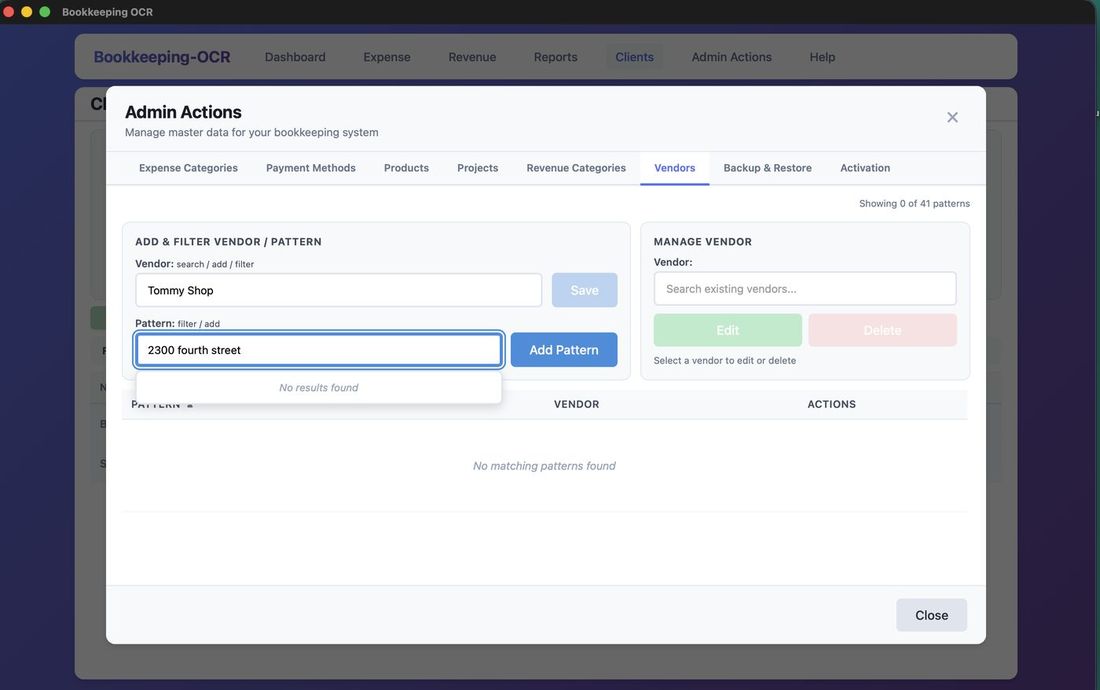
Vendor Patterns
What Is a Vendor Pattern? OCR often can't reliably identify vendor names from receipts. Vendor Patterns map a persistent text string on a receipt to a known vendor name.
Example
A Home Depot receipt may show "Home Depot" as an image OCR cannot read, but consistently contains the text "how doers." By adding Home Depot as the vendor and how doers as the pattern, the OCR will correctly identify the vendor.
Note: The OCR also uses the vendor name itself as a match — both the vendor name and patterns are used together.
The Manage Vendor field lets you edit or delete vendors. Deleting a vendor also removes all associated patterns.
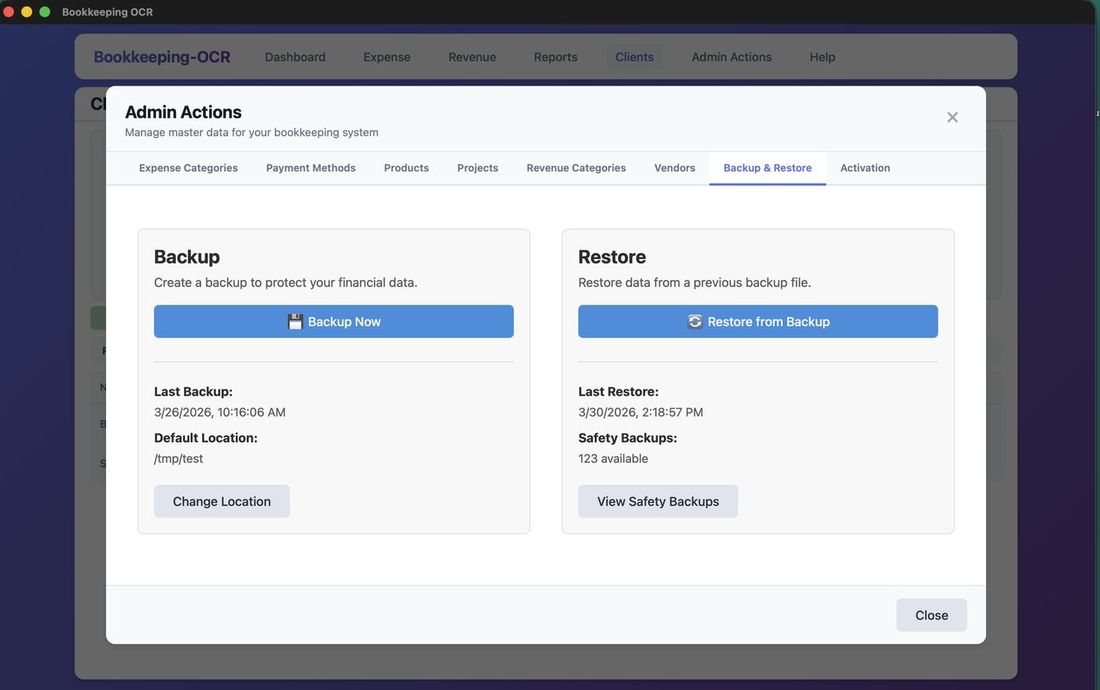
Backup
Step 1 — Set Backup Location
Click Change Location to set where backups will be saved.

Steps 2–3 — Choose Destination & Click Backup Now
Browse to select the destination folder, then click Backup Now.
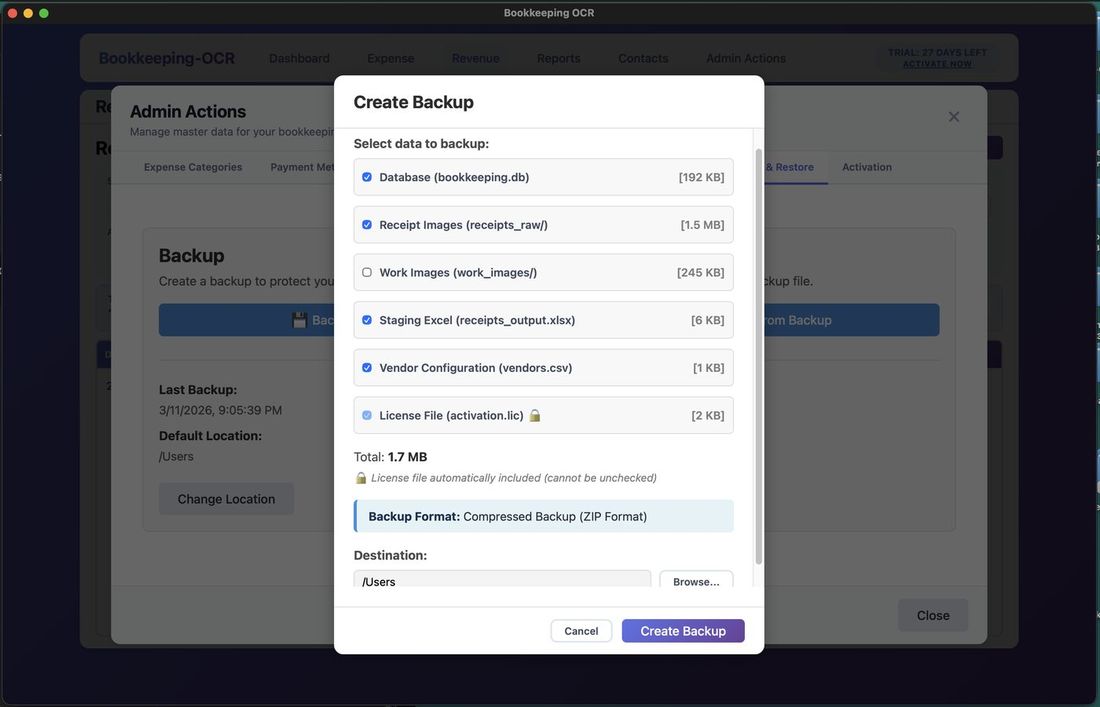
Step 4 — Select Files to Include
A Create Backup pop-out appears. Select files/folders to include — the license file is always included. Click Create Backup.
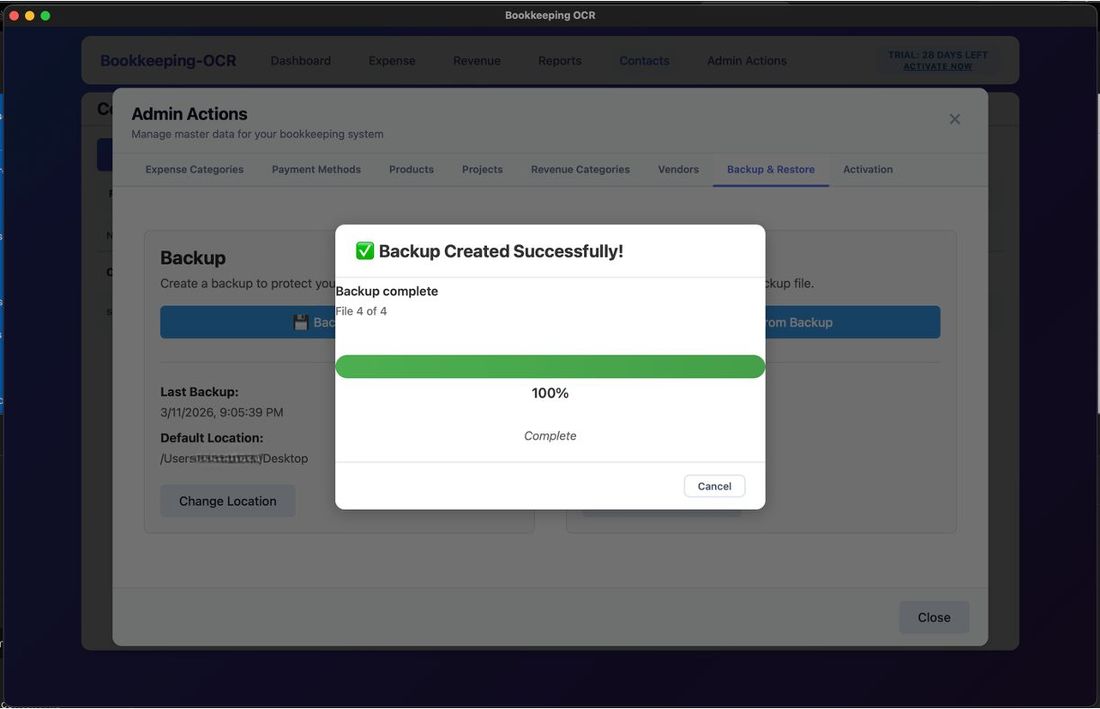
Step 5 — Completion
A progress bar tracks completion.
Safety Backups
A Safety Backup is created automatically before every Restore operation — a redundant copy of current data in case the restore backup fails.
You can delete old safety backups at any time. Click Open Folder to navigate to the storage location.
To delete: Check backups to remove — Delete Selected turns red with a count — Confirm Deletion prompt shown.
Restore
Step 1 — Click Restore From Backup
Click Restore From Backup to begin.
Step 2 — Select a Backup File
A Select Backup File dialog opens. Choose the backup file to restore from.
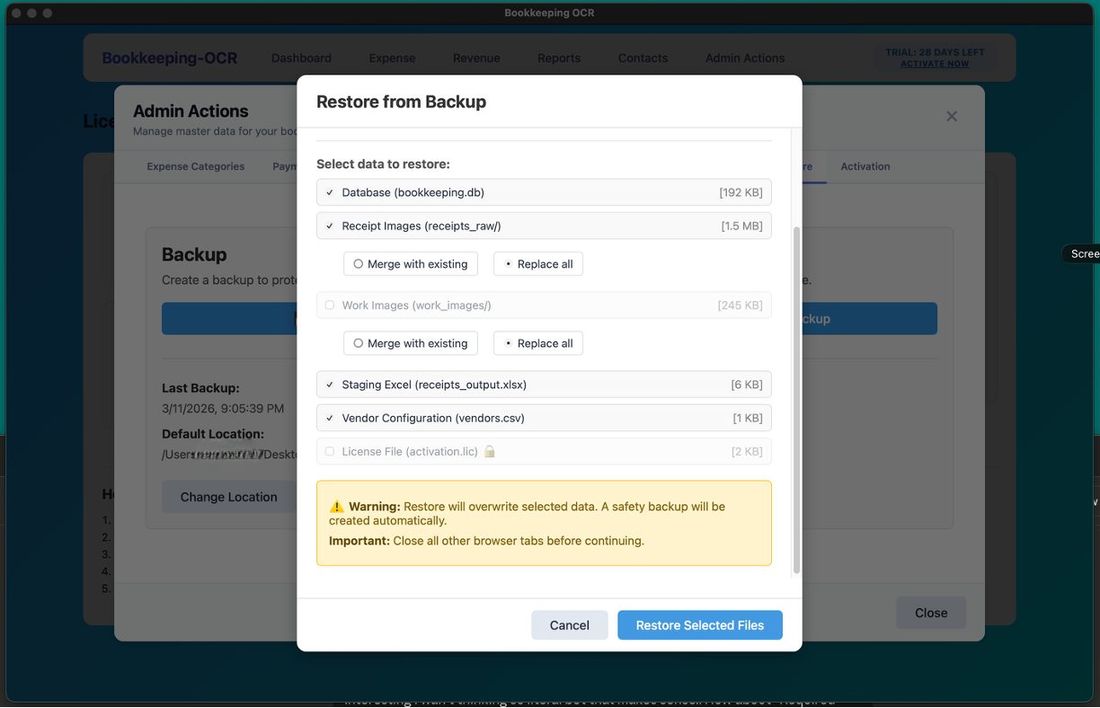
Step 3 — Choose Files to Restore
A file selection screen shows files/folders to restore. The License file is the only required item and cannot be deselected. Choose any additional items you want to restore, then click Restore Selected Files.
Step 4 — Completion
A progress indicator tracks completion.
🔑 Menu 8 — Activation
Step 1 — Select a Plan
Go to the bookkeeping-ocr.com pricing page and select the introductory offer.
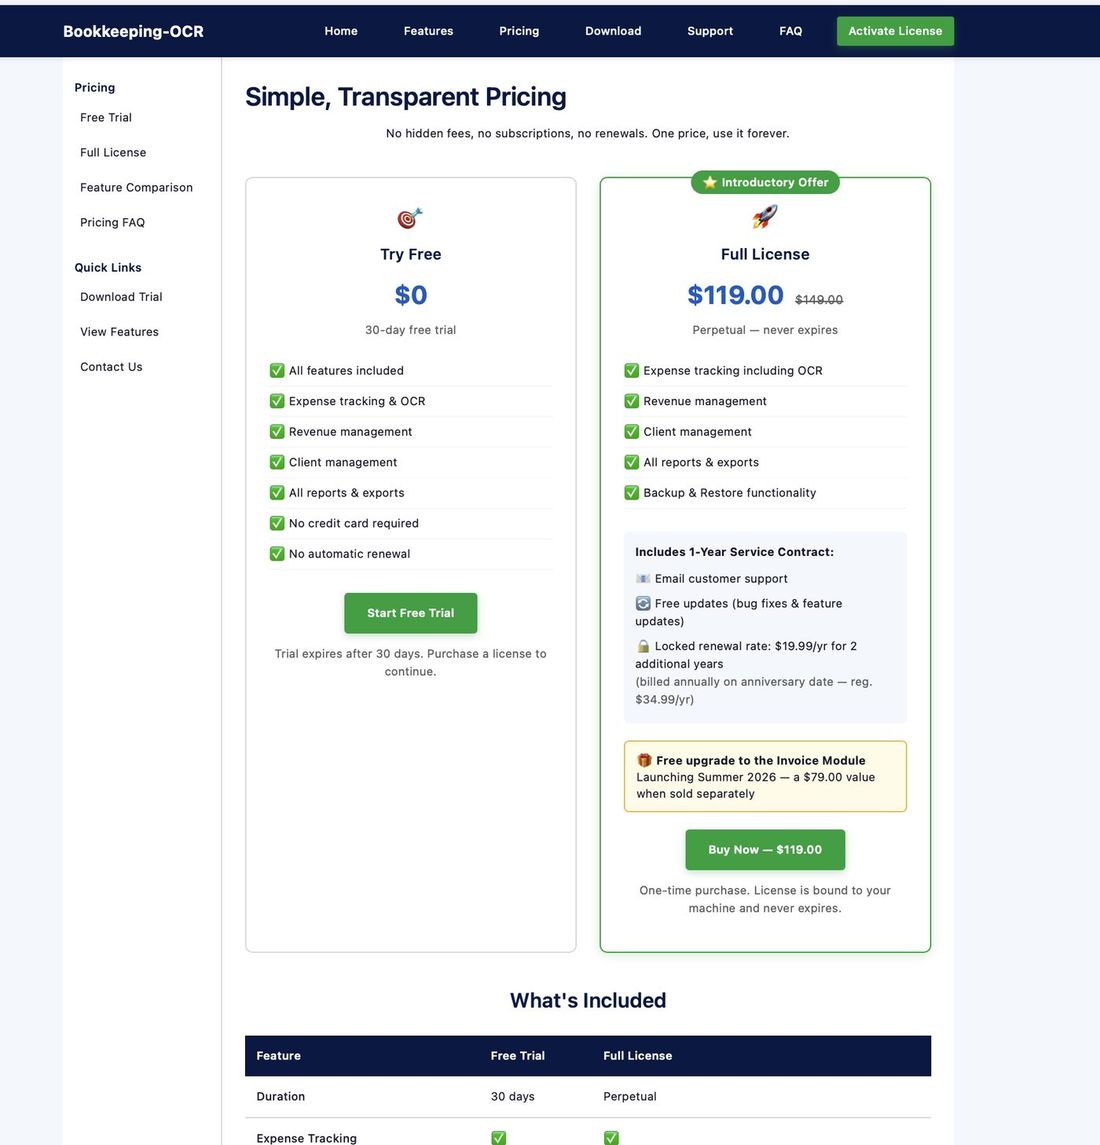
Step 2 — Complete Payment
Complete payment securely through Stripe's encrypted payment system.
Step 3 — Receive Your License Key
After purchase, an email with your License Key will be sent. Store it in a safe place — it is your only record of the key.
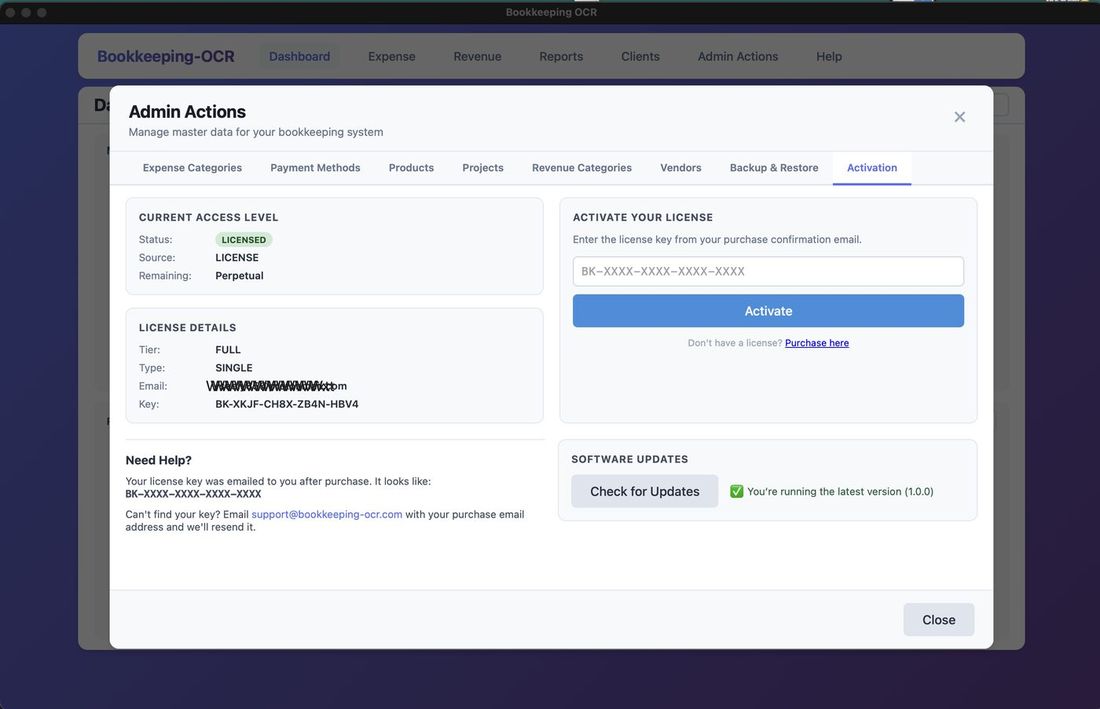
Step 4 — Enter License Key
In the application, go to Admin Actions > Activation tab and enter your license key.
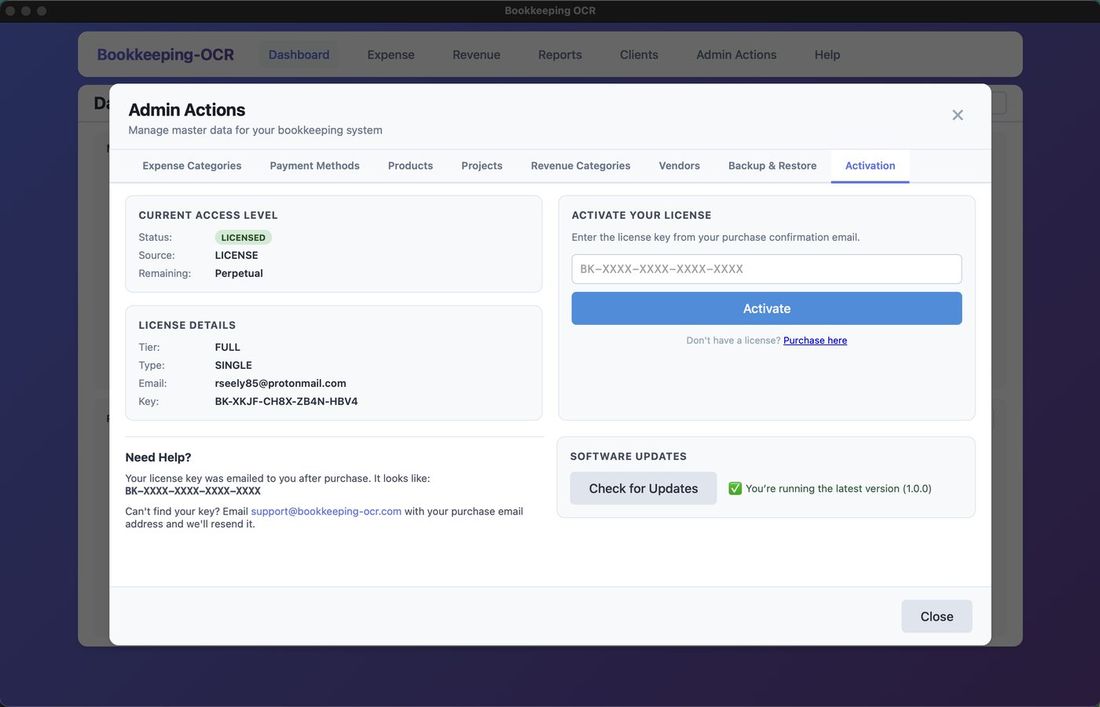
Step 5 — Check for Updates
From the Activation tab, click Check for Updates — the only internet connection the app uses. It compares your version to the latest release and notifies you if an update is ready.
Need More Help?
Check out our FAQ for detailed answers, or contact support directly.